In this final tutorial, I will show how we can make the necessary steps to activate the speech recognition function on the Maixduino and upload the build to the board.
What Will We Need
![]()
- PC with Win 10 with WSL
Maxiduino Firmware Editor Configuration
Here we gooooooooooooooooooooooooo…
Activate Speech Recognizer Function
- Start the WSL Linux terminal as Administrator and make sure the Linux Subsystem is fully updated (see previous series part 1: link )
- Go to the build directory

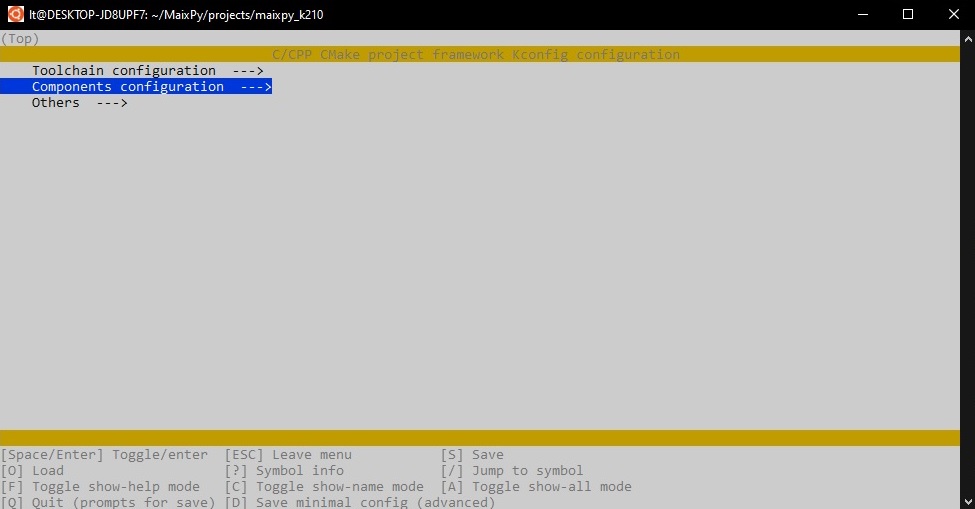
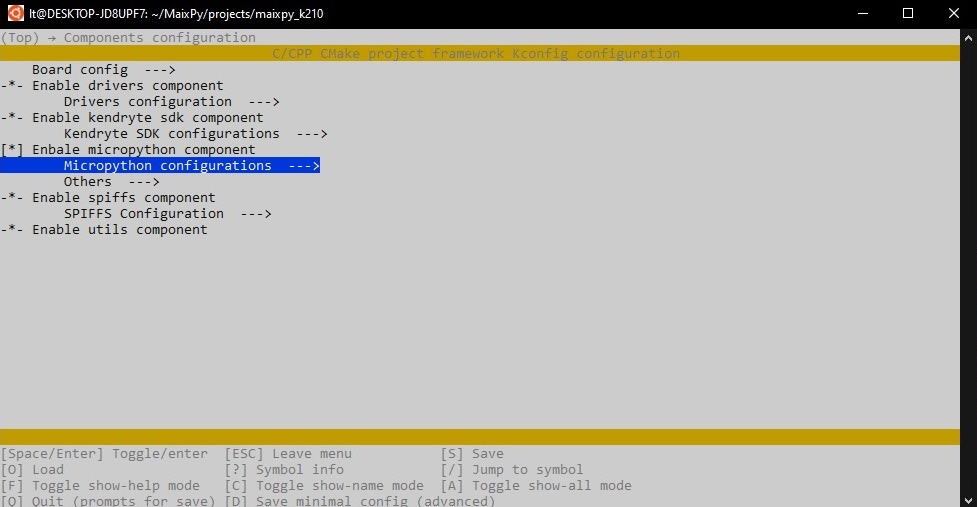
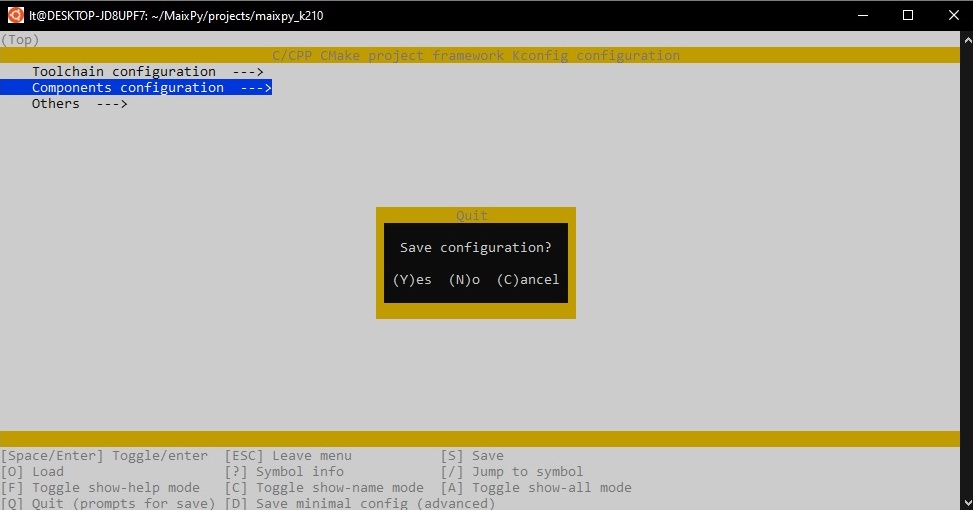
- Enter the editor


- Follow the screenshots and press enter to activate the speech recognizer function
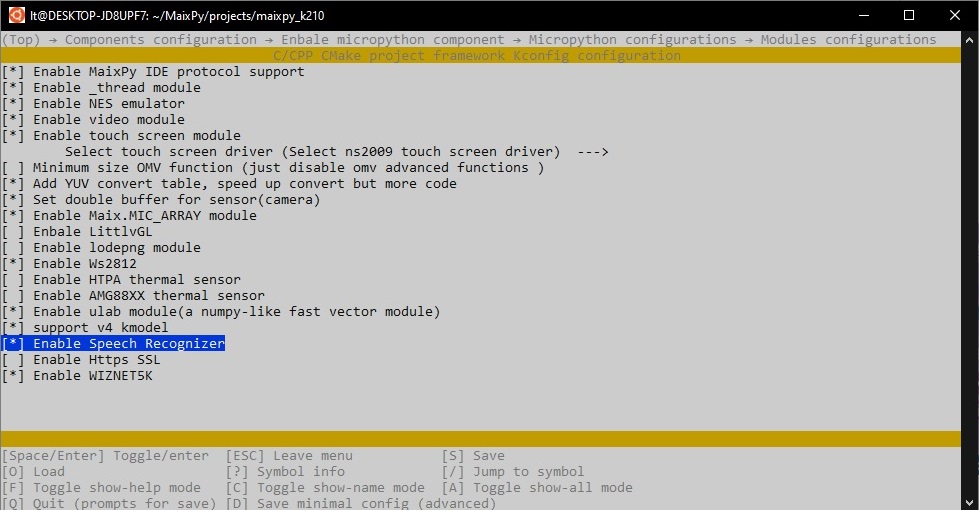
- [ESC] a bunch of times and then Save the configuration
Make the build
- After we activate the Speech Recognizer function and save the configuration, we have to make the build (*.bin file that can be uploaded to the Maixduino Board via Kflash tool). Depending on the machine that you have, the firmware build my take a while.

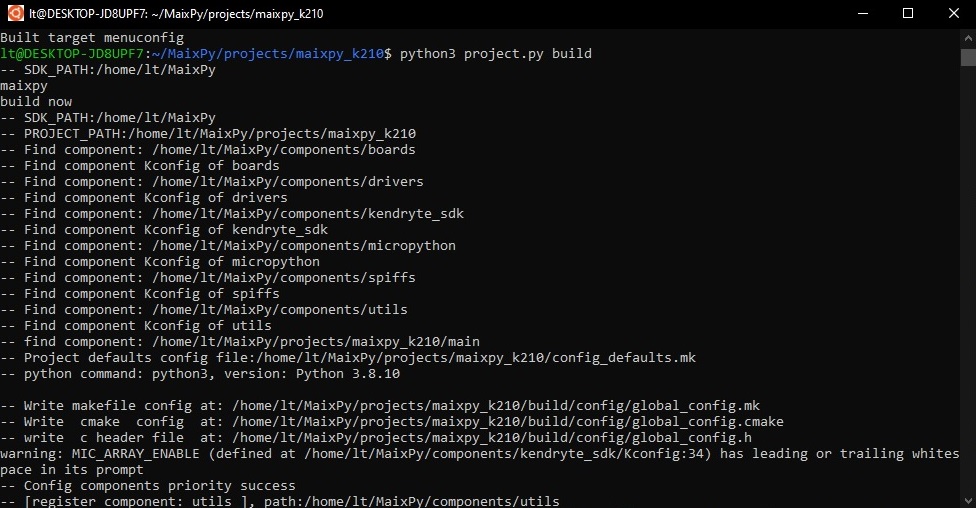
- The build that was made is stored in the [build] directory –> Go there–> see the commands below.
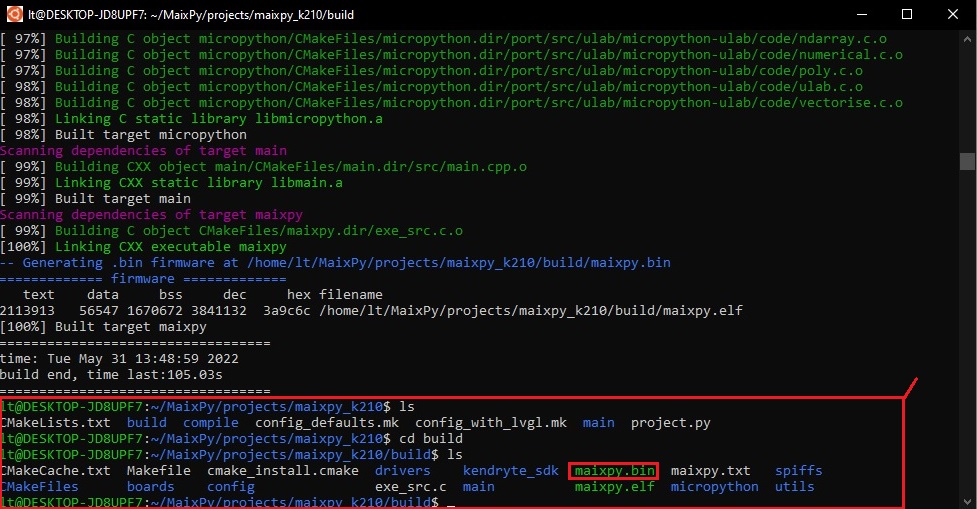
- Now we have to make the connection between Linux and Windows operating systems. With a simple command [explorer.exe .], we access the section were the build is on the windows operating system (remember, WSL is a windows 10 Linux Subsystem). Copy the *.bin file to another directory on the Windows filesystem and remember were.


- If you have trouble accessing the filesystem, check this post: https://www.fourco.nl/blogs/access-to-wsl-filesystem-in-explorer/
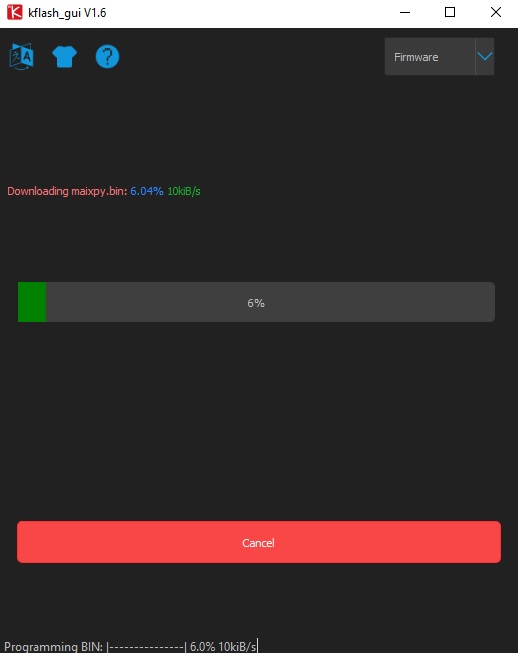
Upload the new Firmware to the Maixduino Board
Open the Kflash tool and upload the new firmware. You can find here more help: First steps

All done, now we can start playing with the Speech Recognition funtion using MaixPy IDE.