
Tutorial #1: Getting Started With The Maixduino
After the brief presentation of the Maixduino, I am going to start a series in which the capabilities of the board will be explored. The kit that we receive usually comes with the Maixduino board, a really small camera, and an miniature LCD display. Before attempting to light an external LED, some configurations and installations must be completed in order to do the standard “Hello World” program. In this first stage, I am going to focus on the Arduino IDE libraries and test their examples.
What will we need?
Besides the Maixduino board, we will need the following:
- USB Type C Cable: It is a “friendly” cable because there is no defined insertion position

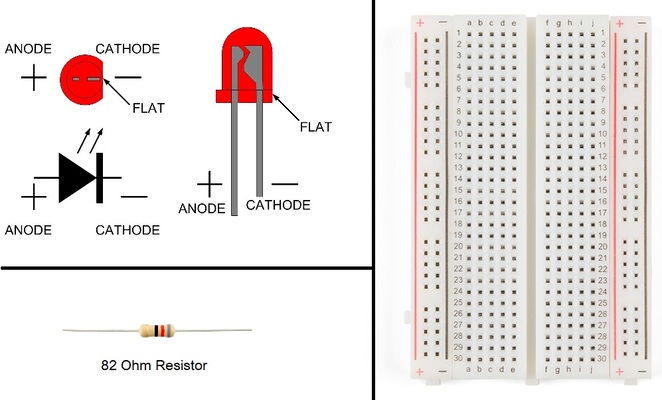
- A breadboard, a generic L.E.D., an 82 Ω resistor, and some jumpers
- A 3D printed case, link to Thingiverse (Optional)
Circuit and Calculations
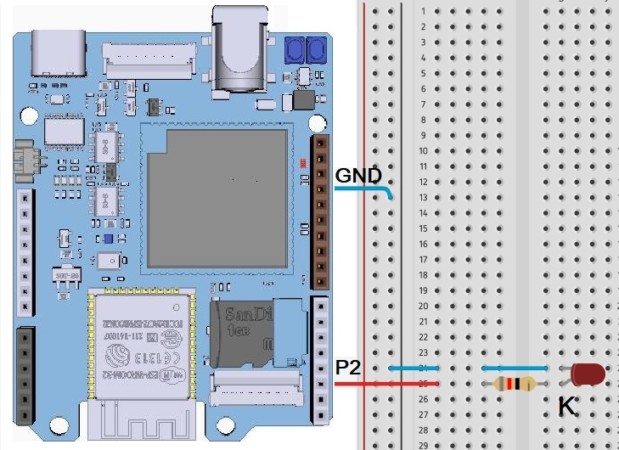
The Maixduino doesn´t have the pin indication on the upper side of the board, and it is a pain in the butt. Either way, with the help of jumper cables or other (like Ethernet electric conductors), the circuit can be made. The LED circuit on one side connects to pin number 2 and on the other to the GND pin. The only observation to be made is the position of the LED with the K signifying the catode (longer leg).
Even in a simple circuit such as this, we still need to pay attention to the electrical characteristics of the board. For the time being, I will not exceed 20 mA of current to the output pins. Another important characteristic of the board is that it only supports 3.3 I/O voltage (and some pins, even 1.8V), which is different from a generic Arduino. We can check this in the datasheet. As a security measure in order not to burn anything in the circuit, I used the following parameters:
- Vled(Voltage Drop of the L.E.D.)= 2 Volt
- Vs(Voltage of the output pin of the Maixduino)=3.3 Volt
- I(Max. current that goes through the L.E.D.)=15 mA
Next, the good stuff (or not):


The approximate commercial value of the E12 resistor series is 82Ω , so that is the one that I will use.
Serial Port Driver Instalation (Optional)
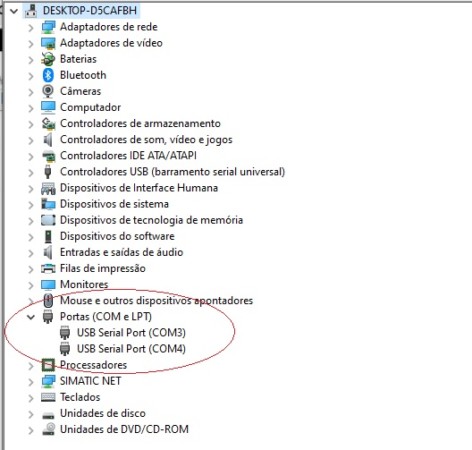
Usually, for Win10 and mac, the drivers that run the port are automatically installed. If not, we will need to go to the FTDI official website by clicking this link. There we will need to choose the operating system and processor architecture, then download the file and install the software. Then we just have to check the Windows Device Manager to make sure that the driver installation was successful.

Below, we can see that when the board is plugged in, two USB serial ports are created (COM3 and COM4). The language is different from English, but the icons are the same.
Arduino IDE Configuration
The Arduino Ide is well known in the maker community. The software can be downloaded here (Official Arduino Website). After the installation, we need to make some adjustments.
- Now we need to open the Arduino Ide and go to Preferences and add
https://dl.sipeed.com/MAIX/Maixduino/package_Maixduino_k210_index.jsonas an “Additional Board Manager URL”.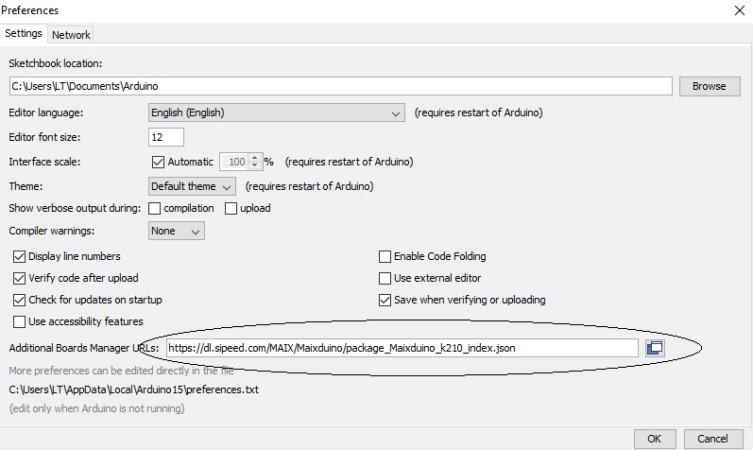
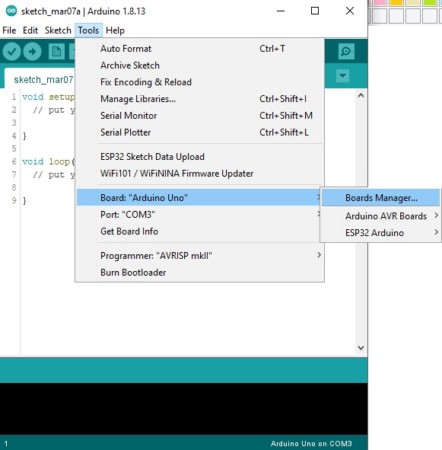
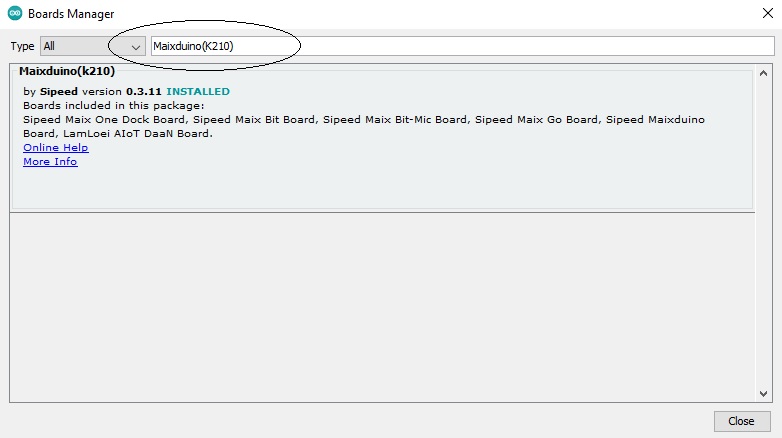
- Then open the Boards Manager from the Tools -> Board menu and install Maixduino(K210)
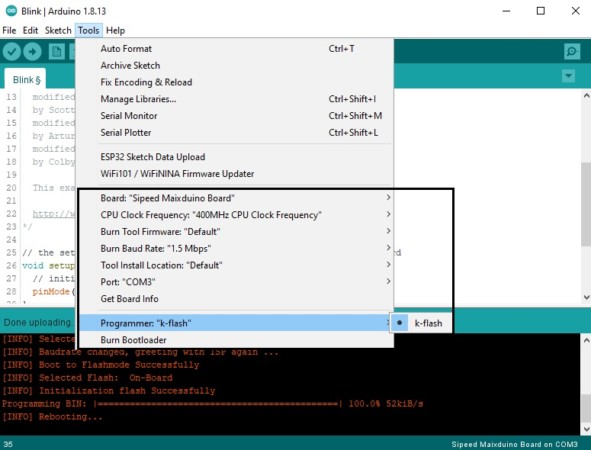
- The last thing we need to do are the board configurations. They are as follows (Menu->Tools):
Hello World – Led Blink Example
At the end of this journey, all that remains to do is for the external LED to blink. We simply go to File->Examples->01.Basics->Blink and open the script. Then just change the pin to number 2 and, if everything goes according to plan, the led should light up for 1 s and switch off for 1 s “forever”.
void setup() {
// initialize digital pin LED_BUILTIN as an output.
pinMode(2, OUTPUT);
}// the loop function runs over and over again forever
void loop() {
digitalWrite(2, HIGH); // turn the LED on (HIGH is the voltage level)
delay(1000); // wait for a second
digitalWrite(2, LOW); // turn the LED off by making the voltage LOW
delay(1000); // wait for a second
}
This was the HelloWorld example. Next we can start doing more complex stuff.