Connecting an ESP8266 to a 2004 LCD and DHT11 Sensor
In this tutorial, we will learn how to connect an ESP8266 microcontroller to a 2004 LCD (20×4 characters) and a DHT11 temperature and humidity sensor. This project will allow you to display temperature and humidity readings on the LCD screen. Let’s dive into the step-by-step process.
Components Required
- ESP8266 development board (e.g., NodeMCU or Wemos D1 Mini) (Affiliate) – https://s.click.aliexpress.com/e/_DD3JQhj
- 2004 LCD module (with I2C interface) – (Affiliate) – https://s.click.aliexpress.com/e/_DE4GaZb
- DHT11 temperature and humidity sensor (Affiliate) – https://s.click.aliexpress.com/e/_DFb2JzR
- Breadboard and jumper wires (Affiliate) – https://s.click.aliexpress.com/e/_Dl5kuk1
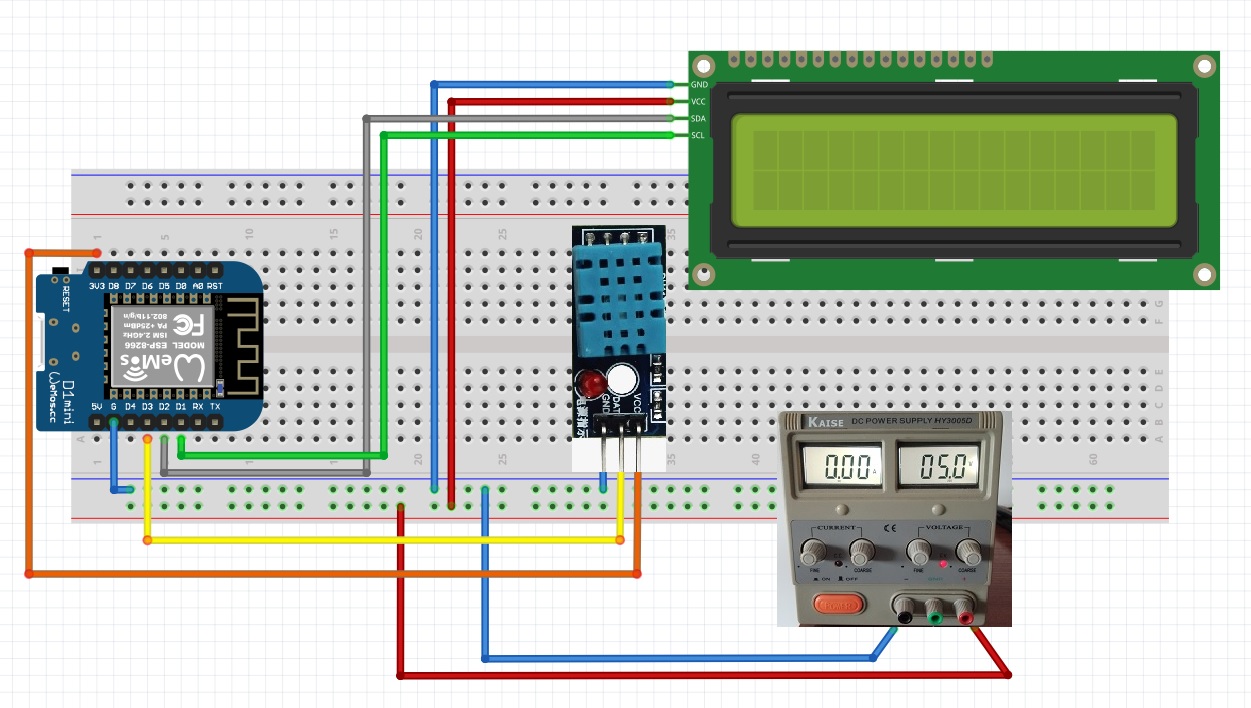
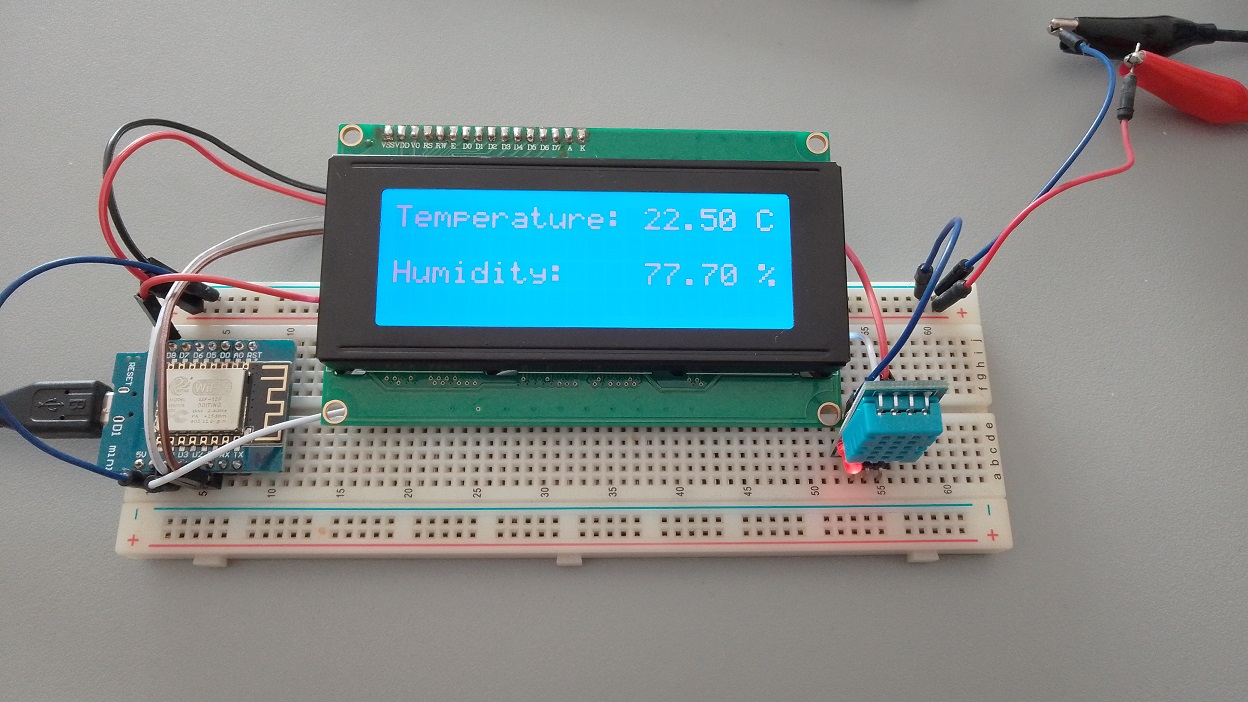
Step 1: Wiring the Components (External regulated power source)
First, let’s connect the components on the breadboard. Follow the wiring diagram below:
- Connect the VCC pin of the 2004 LCD to the 5V
- Connect the GND pin of the 2004 LCD to the GND
- Connect the SDA pin of the 2004 LCD to the D2 pin of the ESP8266.
- Connect the SCL pin of the 2004 LCD to the D1 pin of the ESP8266.
- Connect the VCC pin of the DHT11 sensor to the 3.3V pin of the ESP8266.
- Connect the GND pin of the DHT11 sensor to the GND pin of the ESP8266.
- Connect the DATA pin of the DHT11 sensor to the D3 pin of the ESP8266.
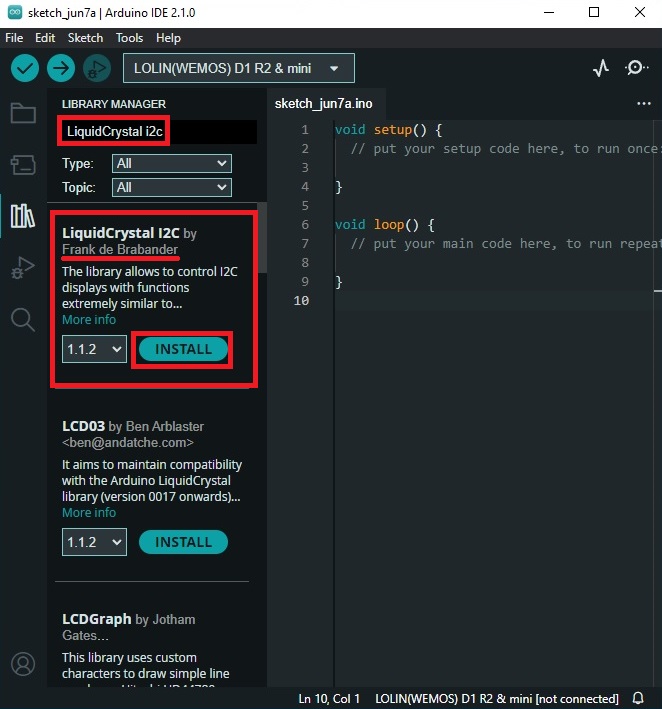
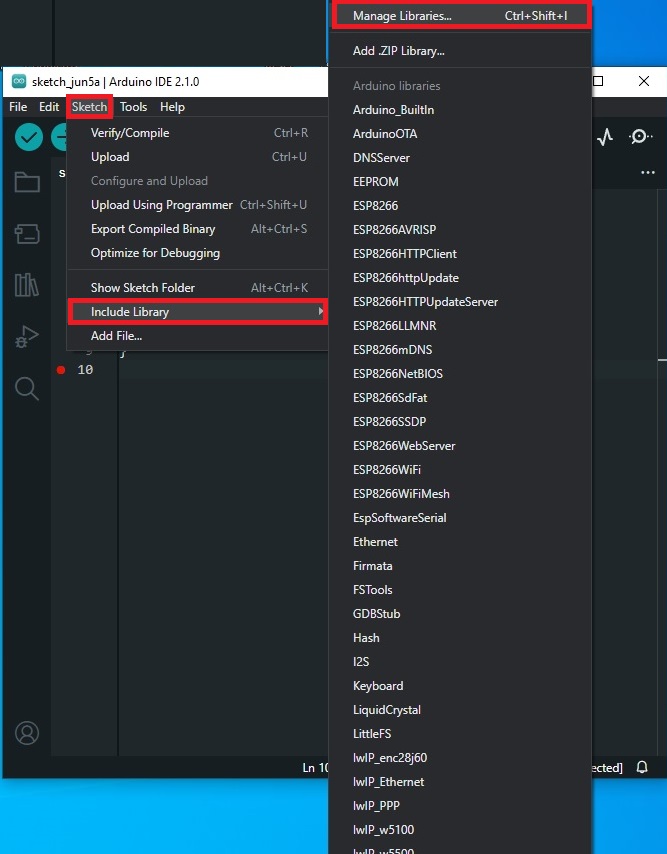
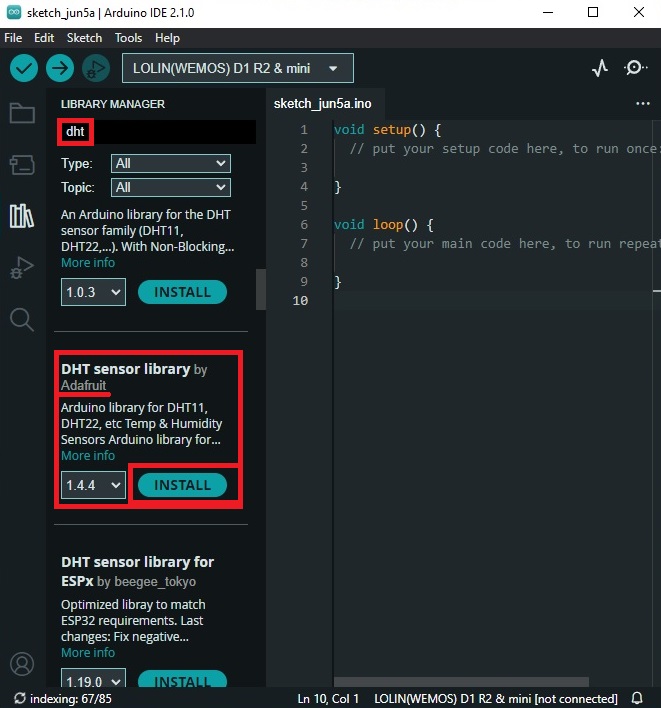
Step 2: Installing the Required Libraries
To program the ESP8266, we will need the following libraries:
- LiquidCrystal_I2C: For controlling the 2004 LCD.

- DHT: For reading data from the DHT11 sensor.
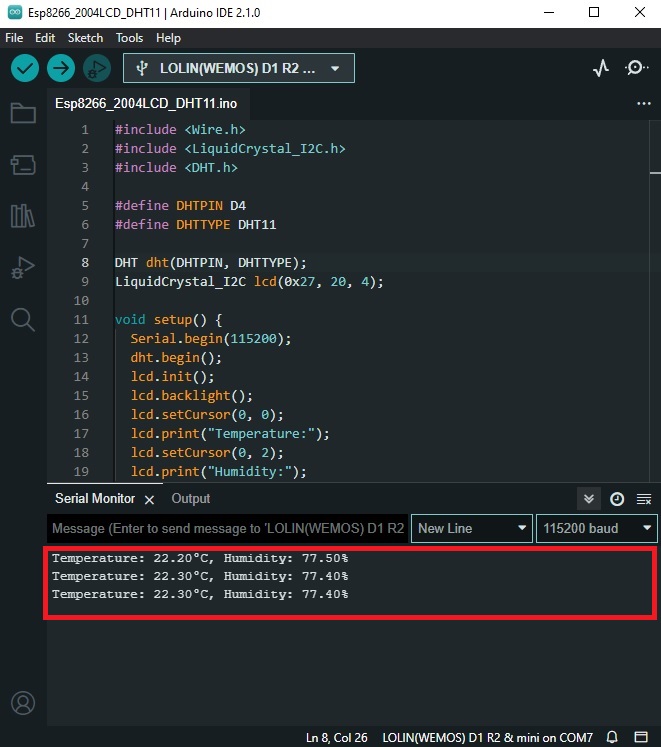
Step 3: Uploading the Code
Now, let’s write the code to read data from the DHT11 sensor and display it on the 2004 LCD. Open the Arduino IDE and create a new sketch. Copy and paste the following code:
#include <Wire.h>
#include <LiquidCrystal_I2C.h>
#include <DHT.h>

#define DHTPIN D3
#define DHTTYPE DHT11

DHT dht(DHTPIN, DHTTYPE);
LiquidCrystal_I2C lcd(0x27, 20, 4);

void setup() {
  Serial.begin(115200);
  dht.begin();
  lcd.init();
  lcd.backlight();
  lcd.setCursor(0, 0);
  lcd.print("Temperature:");
  lcd.setCursor(0, 2);
  lcd.print("Humidity:");
}

void loop() {
  float humidity = dht.readHumidity();
  float temperature = dht.readTemperature();

  if (isnan(humidity) || isnan(temperature)) {
    Serial.println("Failed to read from DHT sensor!");
    return;
  }

  lcd.setCursor(13, 0);
  lcd.print(temperature);
  lcd.print(" C");

  lcd.setCursor(13, 2);
  lcd.print(humidity);
  lcd.print(" %");

  Serial.print("Temperature: ");
  Serial.print(temperature);
  Serial.print("°C, Humidity: ");
  Serial.print(humidity);
  Serial.println("%");

  delay(2000);
}
Make sure to select the correct board and port in the Arduino IDE, then upload the code to your ESP8266.
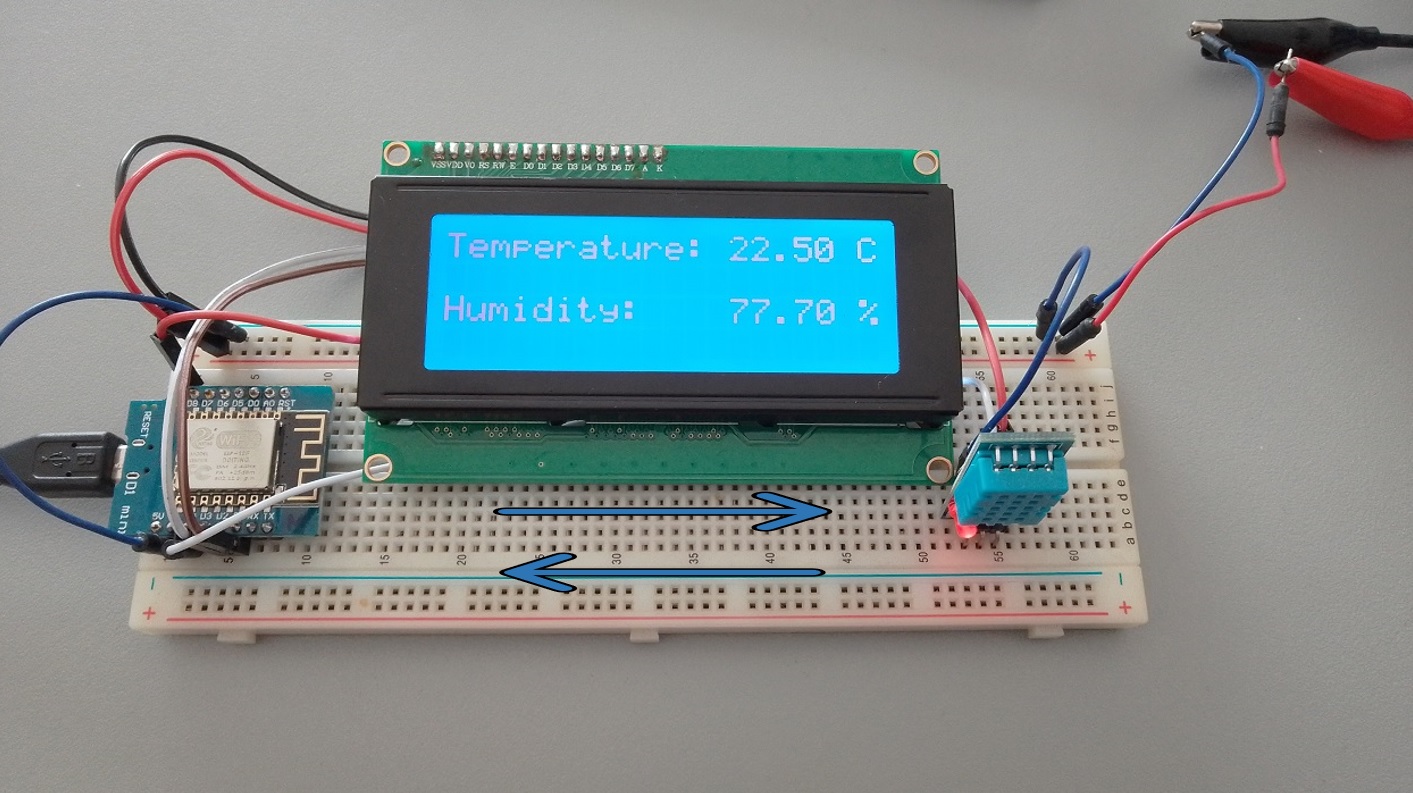
Step 4: Testing the Project
After uploading the code, the ESP8266 should start reading temperature and humidity data from the DHT11 sensor and display it on the 2004 LCD. You should see the temperature and humidity values updating every 2 seconds. If NOT and all the connections were well made, try push RESET button on the board, the info should show in the screen (it happened to me).
Problems?
See the last section of this blog post (LCD Problems): https://www.edgemicrotech.com/connecting-an-esp8266-to-a-2004-lcd-a-comprehensive-guide/
See the last section of this blog post (DHT11 Problems): https://www.edgemicrotech.com/connecting-an-esp8266-to-a-dht11-sensor/
Conclusion:
In this tutorial, we learned how to connect an ESP8266 to a 2004 LCD and a DHT11 sensor to display temperature and humidity readings. This project can be easily expanded to include other sensors or to send the data to a web server. Happy tinkering!