
Connecting an ESP8266 to a DHT11 Sensor
In this blog post, we will walk you through the process of connecting an ESP8266 microcontroller to a DHT11 temperature and humidity sensor. The DHT11 is an affordable and easy-to-use sensor that provides accurate temperature and humidity readings, making it a popular choice for IoT projects and environmental monitoring applications.
Components Required
- ESP8266 microcontroller (e.g., NodeMCU or Wemos D1 Mini) (Affiliate) – https://s.click.aliexpress.com/e/_DD3JQhj
- DHT11 temperature and humidity sensor (Affiliate) – https://s.click.aliexpress.com/e/_DFb2JzR
- Breadboard and jumper wires (Affiliate) – https://s.click.aliexpress.com/e/_Dl5kuk1
- 10k Ohm resistor
Goodies
- DHT11 Datasheet
How does it work?
The interlaced +ive and -ive traces allow a small amount of charge to be stored in each of the traces allowing the circuit to charge up a little, this is called capacitance and this is effected by the material separating the +ive and -ive which is mostly air and its airs permittivity one of the factors for calculating capacitance is affected by temperature and humidity.

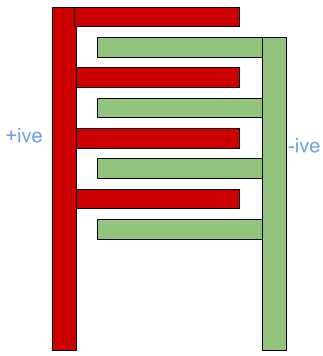
So the chip uses the precision resistor and measures the discharge time through that resistor to calculate the capacitance, and then uses that figure used with the internal temperature sensor inside the main IC to calculate the relative humidity.
Source: https://domoticx.com/sensor-dht-temperatuur-luchtvochtigheid-sensor/
Wiring Diagram
Connect the DHT11 sensor to the ESP8266 microcontroller:
-
- Connect the VCC pin of the DHT11 to the 3.3V pin of the ESP8266.
- Connect the GND pin of the DHT11 to the GND pin of the ESP8266.
- Connect the DATA pin of the DHT11 to the D2 pin (GPIO4) of the ESP8266.
- Place a 10k Ohm resistor between the VCC and DATA pins of the DHT11.

Software Setup
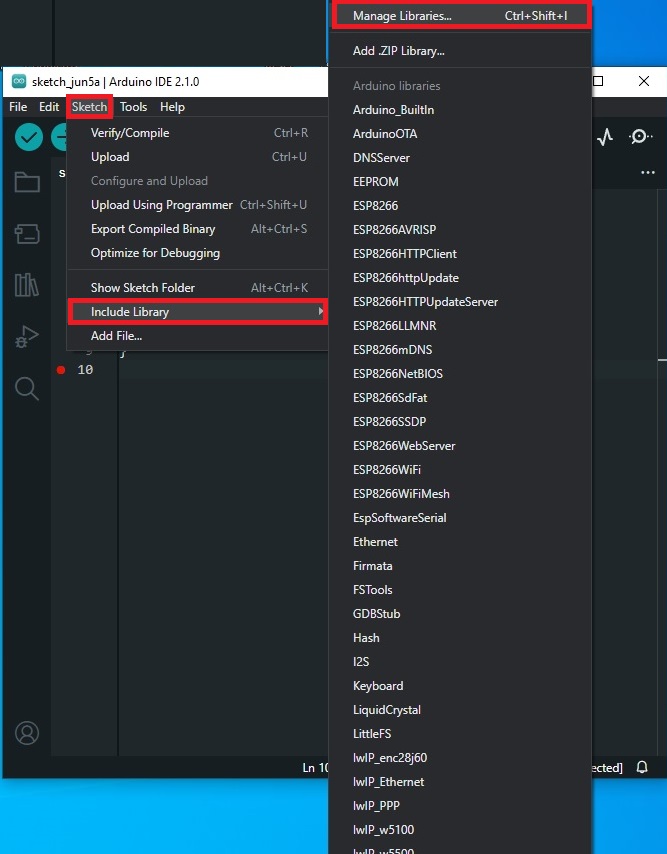
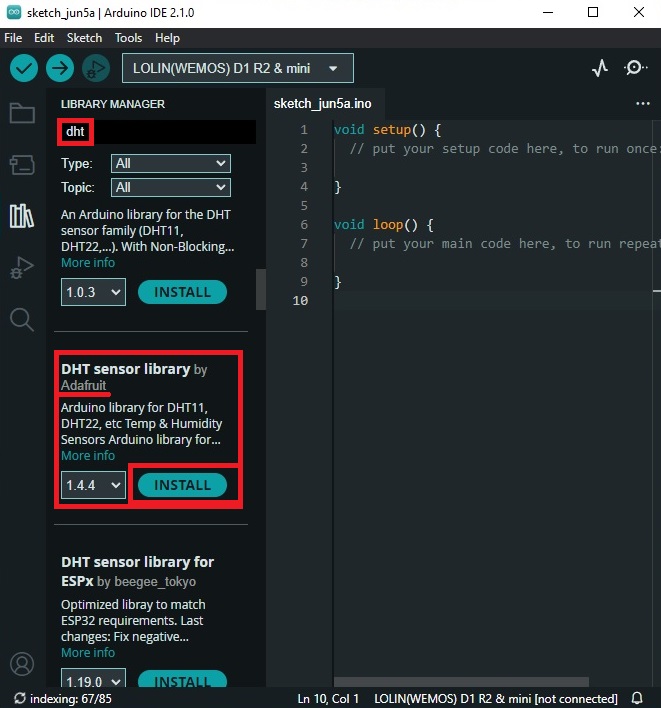
Install the required libraries in the Arduino IDE:
-
- ESP8266 core for Arduino -> My Link to a post that explains this in depth
- Adafruit DHT sensor library
Upload the following code to the ESP8266:
#include <DHT.h>
#include <ESP8266WiFi.h>

#define DHTPIN D2
#define DHTTYPE DHT11

DHT dht(DHTPIN, DHTTYPE);

void setup() {
  Serial.begin(115200);
  dht.begin();
}

void loop() {
  float humidity = dht.readHumidity();
  float temperature = dht.readTemperature();

  if (isnan(humidity) || isnan(temperature)) {
    Serial.println("Failed to read from DHT sensor!");
    return;
  }

  Serial.print("Temperature: ");
  Serial.print(temperature);
  Serial.print("°C, Humidity: ");
  Serial.print(humidity);
  Serial.println("%");

  delay(2000);
}
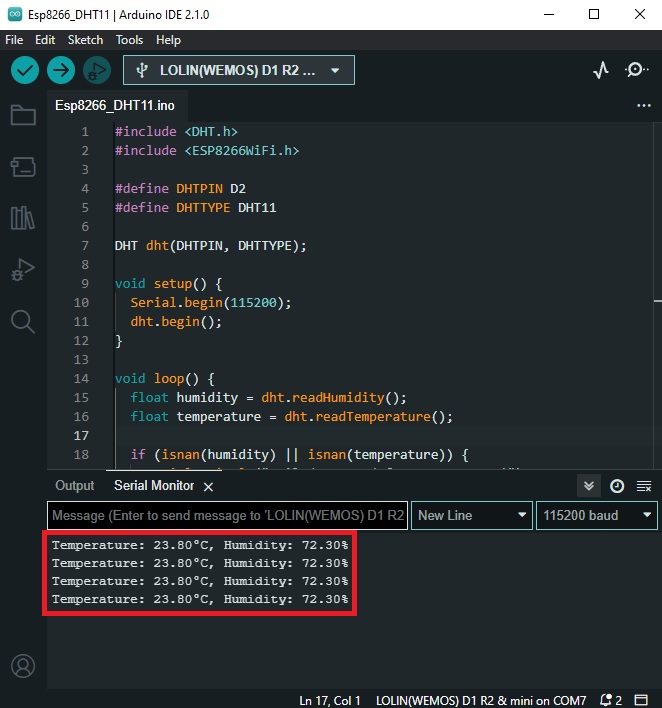
Testing
Power up the ESP8266 microcontroller and open the serial monitor. You should see the temperature and humidity readings from the DHT11 sensor being displayed every two seconds.
Common Problems and Solutions
-
Inaccurate or unstable readings
If you are experiencing inaccurate or unstable readings from the DHT11 sensor, it could be due to a poor connection between the sensor and the ESP8266. Ensure that all connections are secure and that the 10k Ohm resistor is correctly placed between the VCC and DATA pins of the DHT11.
-
“Failed to read from DHT sensor!” error message
If you see this error message in the serial monitor, it could be due to a wiring issue or a faulty DHT11 sensor. Double-check the wiring connections and ensure that the DHT11 sensor is properly connected to the ESP8266. If the problem persists, try replacing the DHT11 sensor with a new one.
-
Serial monitor not displaying any data
If the serial monitor is not displaying any data, ensure that the correct serial port is selected in the Arduino IDE (Tools > Port). Also, make sure that the baud rate in the serial monitor matches the baud rate specified in the Serial.begin() function in the code (115200 in this example).
-
Incompatible library versions
If you encounter compilation errors related to the DHT library, it could be due to an incompatible library version. Make sure you have installed the latest version of the DHT sensor library from the provided link. If the problem persists, try installing an older version of the library.
-
ESP8266 not recognized by the computer
If your computer does not recognize the ESP8266 when connected via USB, it could be due to a missing or outdated driver. Download and install the appropriate driver for your ESP8266 board. For example, the NodeMCU and Wemos D1 Mini boards typically use the CP2102 USB-to-UART bridge driver, which can be downloaded from the Silicon Labs website: https://www.silabs.com/developers/usb-to-uart-bridge-vcp-drivers
Conclusion
In this blog post, we demonstrated how to connect an ESP8266 microcontroller to a DHT11 temperature and humidity sensor. This simple setup can be easily integrated into various IoT projects, such as home automation systems, weather stations, or environmental monitoring applications. With the ESP8266’s Wi-Fi capabilities, you can also send the sensor data to a remote server or cloud service for further analysis and visualization.