
Wemos D1 Mini with TM1637 and Logic Level Converter
The Wemos D1 Mini is a versatile and compact development board based on the ESP8266 chip, widely used for Internet of Things (IoT) projects. In this guide, we’ll walk you through the process of connecting the Wemos D1 Mini with the TM1637 display and a logic level converter for seamless communication. The TM1637 is a popular 4-digit 7-segment display driver, and the logic level converter is essential when interfacing devices that operate at different voltage levels.
Parts Needed
- ESP8266 Development Board (such as Wemos D1 mini) (Affiliate) – https://s.click.aliexpress.com/e/_DD3JQhj
- TM1637 display module (Affiliate) – https://s.click.aliexpress.com/e/_DCwvPgx
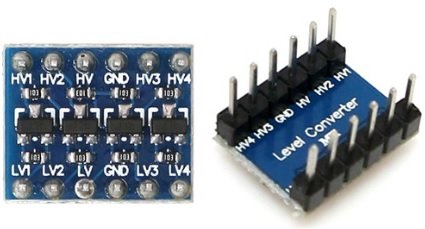
- Logic Converter (Affiliate) – https://s.click.aliexpress.com/e/_Dmx9x5D
- Breadboard and jumper wires (Affiliate) – https://s.click.aliexpress.com/e/_Dl5kuk1
Gather Your Components
Before you begin, make sure you have all the necessary components listed above. Double-check the specifications of your logic level converter to ensure it matches the voltage levels of your Wemos D1 Mini and TM1637.
Understanding the Logic Level Conversion
The Wemos D1 Mini operates at 3.3V, while the TM1637 typically works at 5V. To bridge this voltage gap, we’ll use a logic level converter to ensure proper communication between the devices.
Wiring the Components
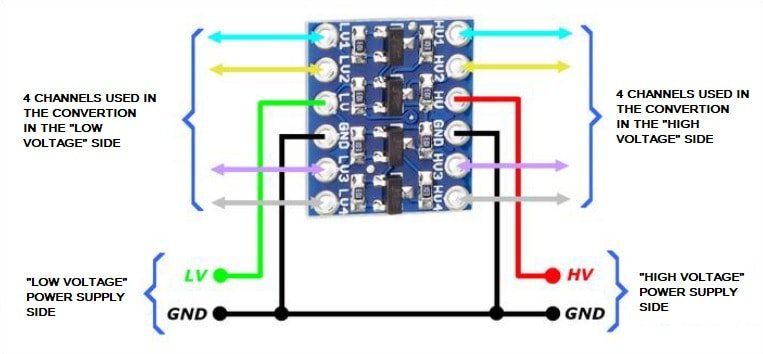
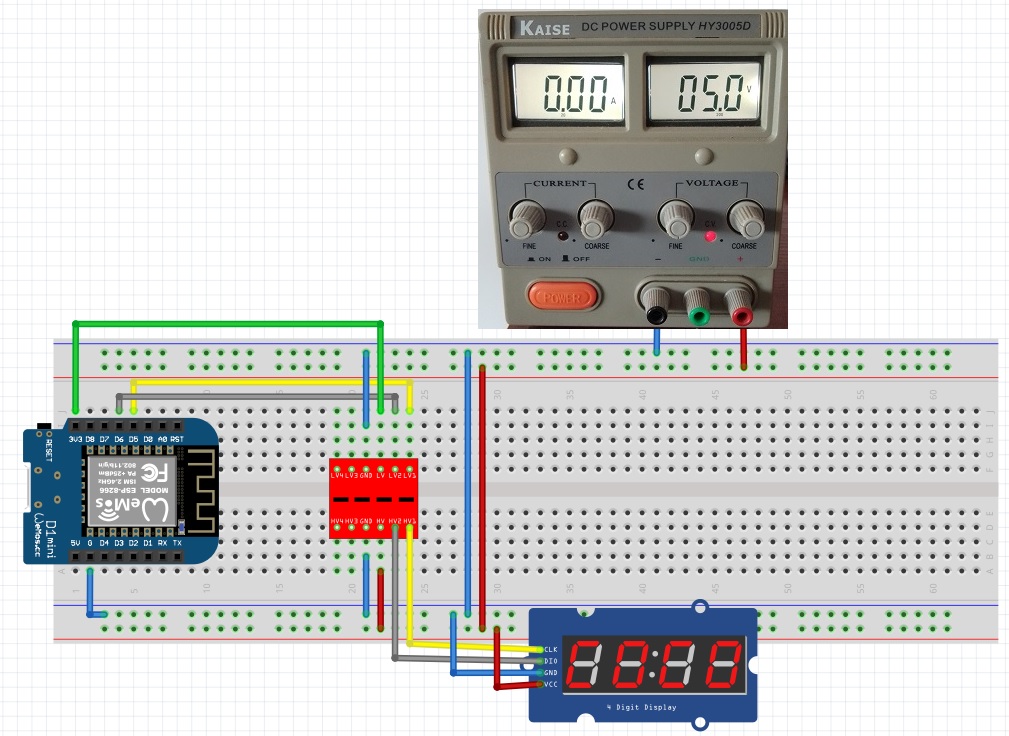
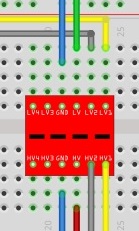
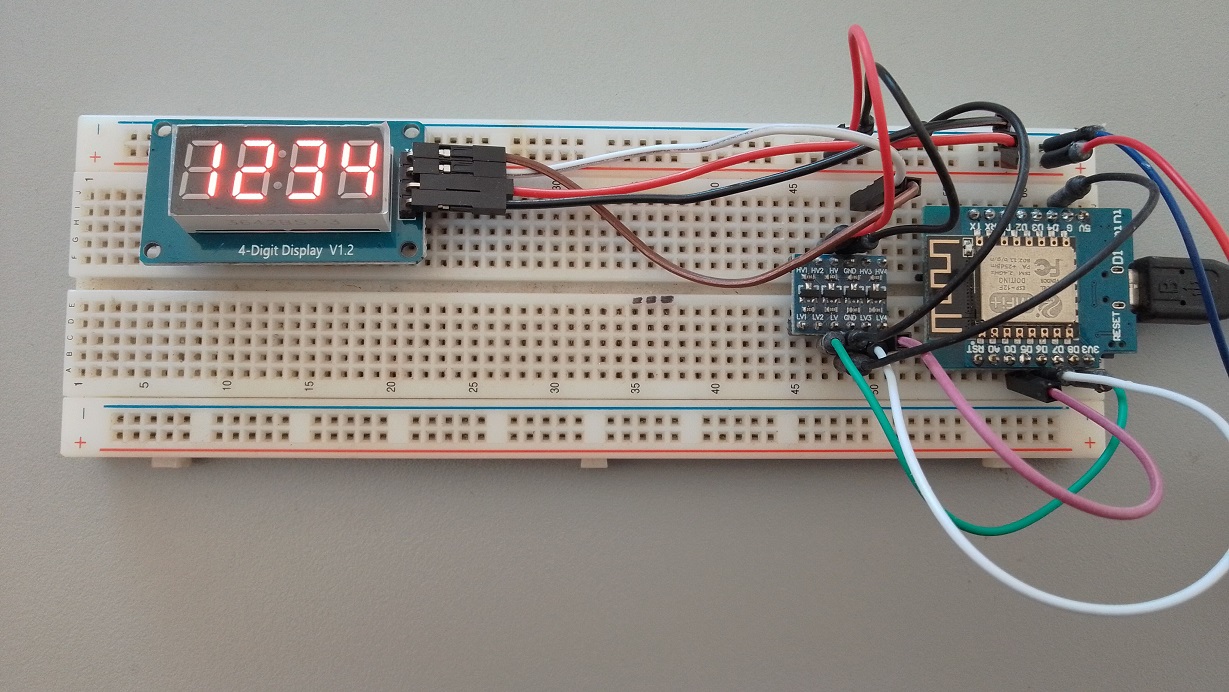
Refer to the following wiring schematic:
- Connect the GND pin of the TM1637 to the GND pin of the ESP8266/Global GND. (ALL THE GND´S HAVE TO BE CONNECTED BETWEEN EACH OTHER)
- Connect the CLK pin of the D5 Pin of the Wemos D1 Mini.
- Connect the DIO pin of the D6 Pin of the Wemos D1 Mini.
The logic converter module as to be supplied by TWO Voltages. On the LOW level with 3.3V and on the HIGH level with 5V to make the voltage conversion.
Adding Required Libraries
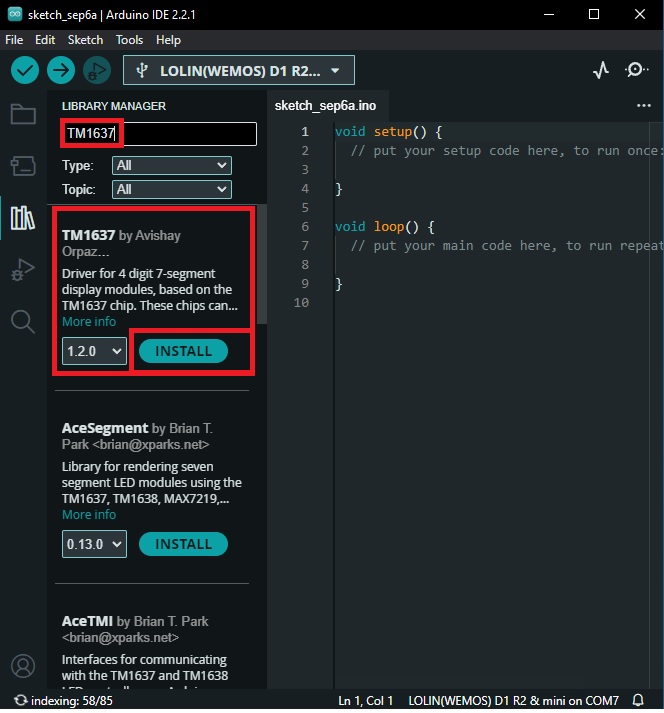
To control the TM1637 display module, we need to install the “TM1637Display” library.
- Open the Arduino IDE, go to “Sketch” → “Include Library” → “Manage Libraries” and search for “TM1637”.
- Install the library authored by “Avishay” latest version.
Program the Wemos D1 Mini
Here is a simple program to test the display:
#include <TM1637Display.h>

const int CLK_PIN = D5;  // CLK pin connected to D5
const int DIO_PIN = D6;  // DIO pin connected to D6

TM1637Display display(CLK_PIN, DIO_PIN);  // Initialize the TM1637 display

void setup() {
  display.setBrightness(7); // Set display brightness (0-7)
}
void loop() {
  display.showNumberDec(1234);  // Display the number 1234
  delay(2000);                  // Delay for 2 seconds
  display.clear();              // Clear the display
  delay(1000);                  // Delay for 1 second
}
More examples?
For more example on how to use the Display, feel free to explorer the following post: https://www.edgemicrotech.com/connecting-a-tm1637-to-an-esp8266/
Conclusion:
You’ve successfully connected the Wemos D1 Mini with the TM1637 display using a logic level converter. This setup allows seamless communication between devices operating at different voltage levels, opening up a myriad of possibilities for your IoT projects. Feel free to explore more features and functionalities of the TM1637 library to enhance your project further.