
Connecting Two ESP8266 Modules Using ESP-NOW: Hello World
ESP-NOW is a powerful protocol that enables communication between ESP8266 devices without the need for a traditional Wi-Fi network. In this blog post, we will explore the connection between two ESP8266 modules using ESP-NOW in detail. We’ll cover the necessary hardware, software setup, and the steps required to establish communication between the devices.
Introduction to ESP-NOW
ESP-NOW is a communication protocol developed by Espressif Systems for their ESP8266 and ESP32 series of microcontrollers. It enables direct device-to-device communication without the need for connecting to a Wi-Fi network.
Some key features of ESP-NOW include:
- Low power consumption
- Fast communication with low latency
- Support for one-to-one and one-to-many communication
- Easy integration with existing Wi-Fi network
Hardware Requirements
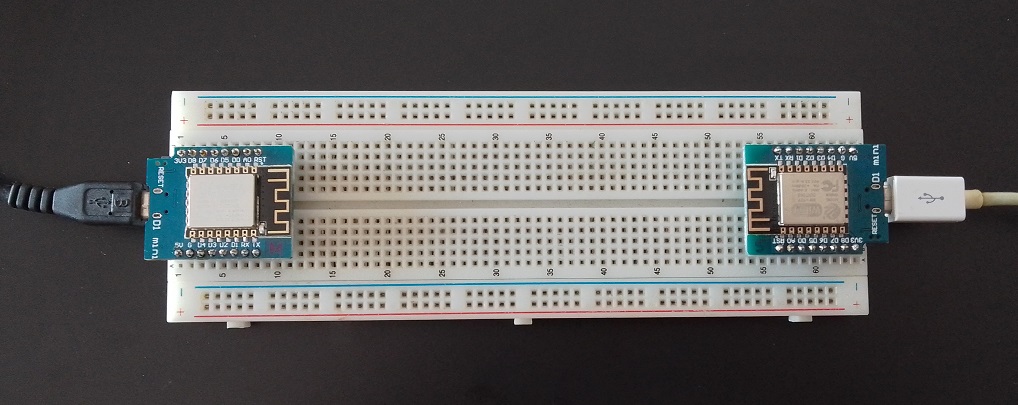
To establish a connection between two ESP8266 modules using ESP-NOW, you will need the following hardware components:
- 2x ESP8266 modules (e.g., NodeMCU, Wemos D1 Mini, or any other ESP8266 based board) (Affiliate) – https://s.click.aliexpress.com/e/_DD3JQhj
- Breadboard and jumper wires (Affiliate) – https://s.click.aliexpress.com/e/_Dl5kuk1
- 2x micro-USB cables for programming and powering the ESP8266 modules
- A computer with a USB port for uploading the code
Software Setup
Before proceeding with the hardware connections, you will need to set up the necessary software components:
- Install the Arduino IDE on your computer.
- Add the ESP8266 board support package to the Arduino IDE. Follow these steps:a. Open Arduino IDE and go to File > Preferences.b. Enter the following URL in the “Additional Boards Manager URLs” field:
http://arduino.esp8266.com/stable/package_esp8266com_index.jsonc. Click “OK” - Then go to Tools > Board > Boards Manager and Search for “esp8266” and install the “esp8266” package by ESP8266 Community.
Establishing Connection Between Two ESP8266 Modules
- Now that the software setup is complete, we can proceed with establishing the connection between the two ESP8266 modules:
- Connect each ESP8266 module to your computer using a micro-USB cable.
- Open two instances of the Arduino IDE, one for each ESP8266 module.
- In each instance, select the appropriate board (e.g., NodeMCU 1.0 for a NodeMCU board) and the corresponding port under Tools > Board and Tools > Port.
- This might be stupid to say, but make sure that you clearly identify the boards as sender and receiver and double-check the port multiple times. This confusion happened to me.
Replace the receiverMAC variable in the sender’s code with the MAC address of the receiver module. You can find the receiver MAC address checking my latest post.
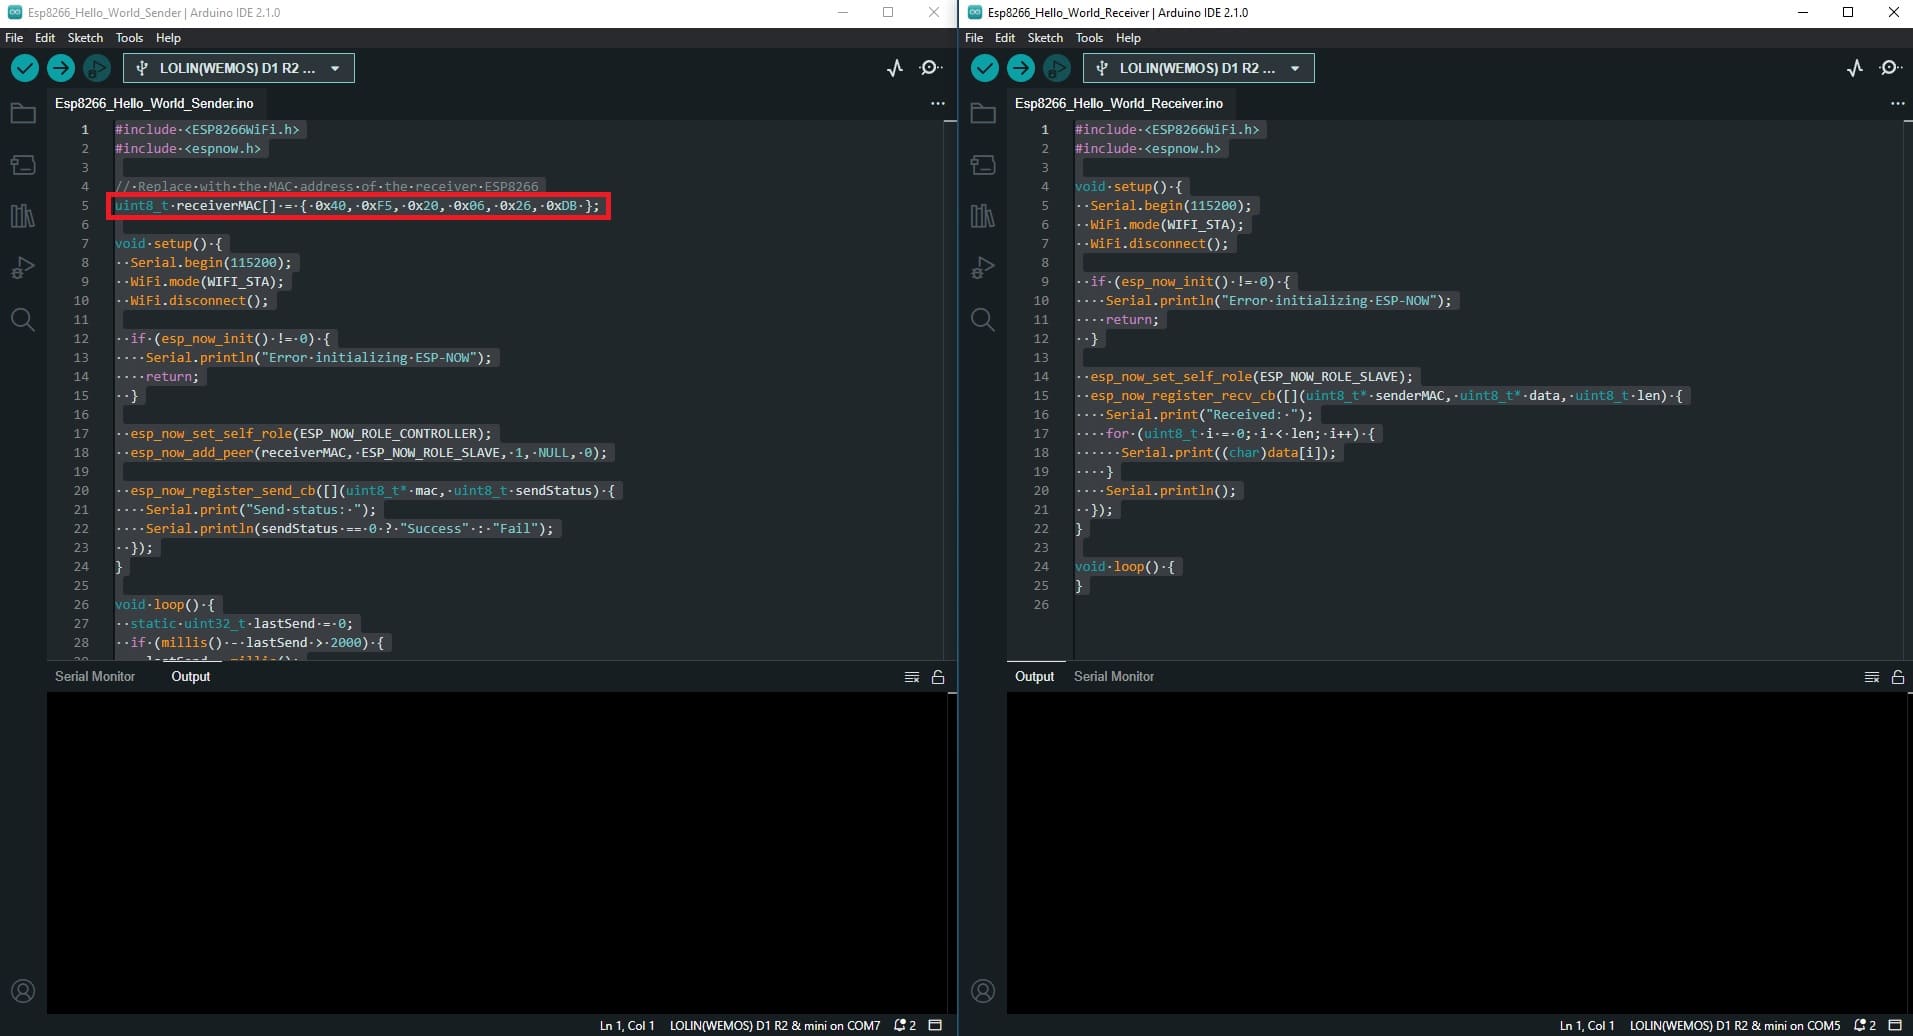
Upload the following code to one of the ESP8266 modules (sender) with the Mac address of the Receiver changed:
#include <ESP8266WiFi.h>
#include <espnow.h>

// Replace with the MAC address of the receiver ESP8266
uint8_t receiverMAC[] = { 0x40, 0xF5, 0x20, 0x06, 0x26, 0xDB };

void setup() {
  Serial.begin(115200);
  WiFi.mode(WIFI_STA);
  WiFi.disconnect();

  if (esp_now_init() != 0) {
    Serial.println("Error initializing ESP-NOW");
    return;
  }

  esp_now_set_self_role(ESP_NOW_ROLE_CONTROLLER);
  esp_now_add_peer(receiverMAC, ESP_NOW_ROLE_SLAVE, 1, NULL, 0);

  esp_now_register_send_cb([](uint8_t* mac, uint8_t sendStatus) {
    Serial.print("Send status: ");
    Serial.println(sendStatus == 0 ? "Success" : "Fail");
  });
}

void loop() {
  static uint32_t lastSend = 0;
  if (millis() - lastSend > 2000) {
    lastSend = millis();
    uint8_t data[] = "Hello, ESP-NOW!";
    esp_now_send(receiverMAC, data, sizeof(data));
  }
}
Upload the following code to the other ESP8266 module (receiver):
#include <ESP8266WiFi.h>
#include <espnow.h>

void setup() {
  Serial.begin(115200);
  WiFi.mode(WIFI_STA);
  WiFi.disconnect();

  if (esp_now_init() != 0) {
    Serial.println("Error initializing ESP-NOW");
    return;
  }

  esp_now_set_self_role(ESP_NOW_ROLE_SLAVE);
  esp_now_register_recv_cb([](uint8_t* senderMAC, uint8_t* data, uint8_t len) {
    Serial.print("Received: ");
    for (uint8_t i = 0; i < len; i++) {
      Serial.print((char)data[i]);
    }
    Serial.println();
  });
}

void loop() {
}
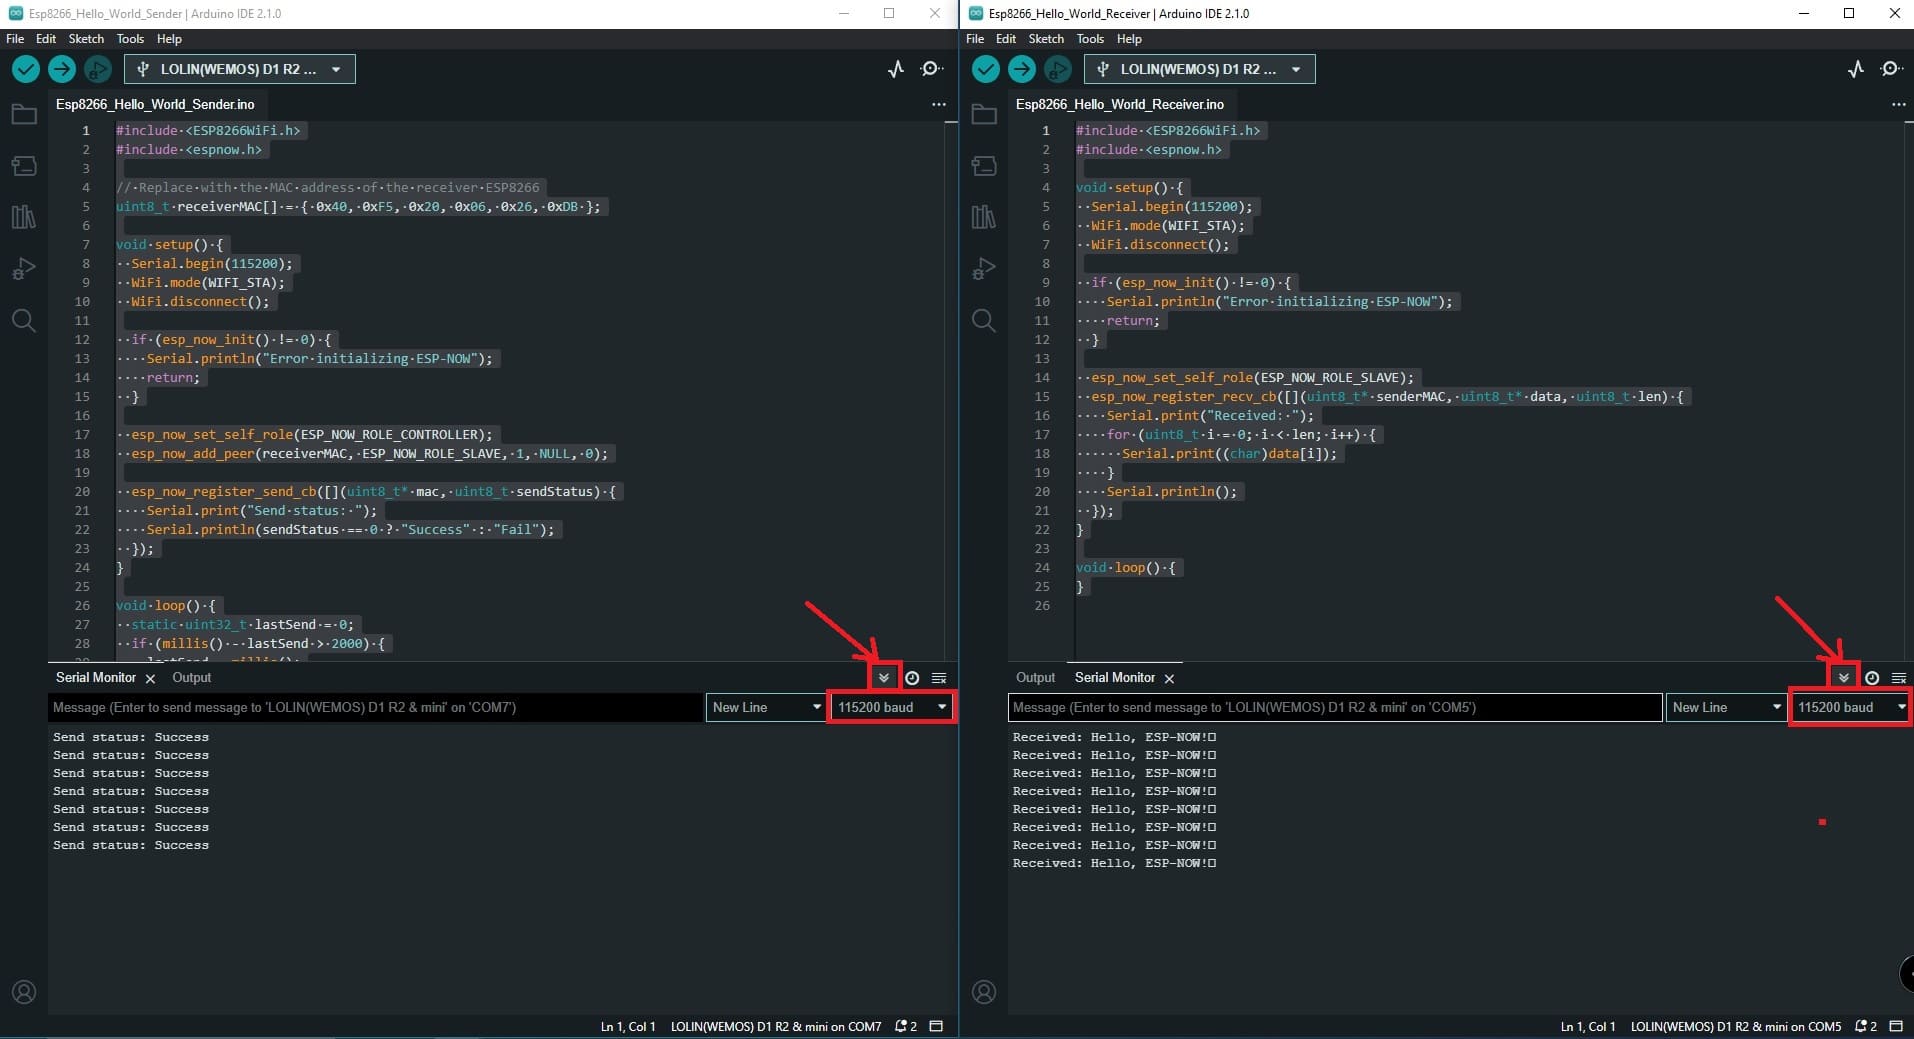
Open the Serial Monitor for each instance of the Arduino IDE and set the baud rate to 115200.
Once the codes are uploaded, you should see messages being sent from the sender module and received by the receiver module in their respective Serial Monitors.

Make sure that the Autoscroll function is activated.
Troubleshooting and Tips
- This might be stupid to say, but make sure that you clearly identify the boards as sender and receiver and double-check the port multiple times. This confusion happened to me.
- If you encounter issues with communication, double-check the MAC addresses used in the sender’s code.
- Ensure that both ESP8266 modules are within the range of each other. ESP-NOW typically has a range of about 200 meters in open spaces.
- If you’re using ESP-NOW for battery-powered devices, consider using the
WiFi.setSleepMode()function to save power. - For more advanced use cases, consider using ESP-NOW with encryption enabled for secure communication.
Conclusion
In this blog post, we have explored the connection between two ESP8266 modules using ESP-NOW. We covered the necessary hardware, software setup, and the steps required to establish communication between the devices. ESP-NOW is a powerful and versatile protocol, enabling low-latency, low-power, and easy-to-implement communication between ESP8266 and ESP32 devices.