Interfacing TM1637 with Arduino Nano BLE Sense 33
The TM1637 is an LED driver controller that’s commonly used to control 7-segment LED displays. In this blog post, we’ll show you how to interface a TM1637-based 4-digit LED display with an Arduino Nano 33 BLE Sense microcontroller. This will allow you to display numbers and some letters on the LED display.
What You’ll Need
- Arduino Nano 33 BLE Sense
- TM1637 4-digit LED display (Affiliate) – https://s.click.aliexpress.com/e/_DCwvPgx
- Breadboard and Jump Wires
- Arduino IDE installed on your computer
Goodies:
TM1637 Datasheet – Link to Download
Step 1: Connect Your Hardware
First, let’s connect the hardware. The TM1637 module usually has four pins:
- VCC (Power)
- GND (Ground)
- CLK (Clock)
- DIO (Data I/O)
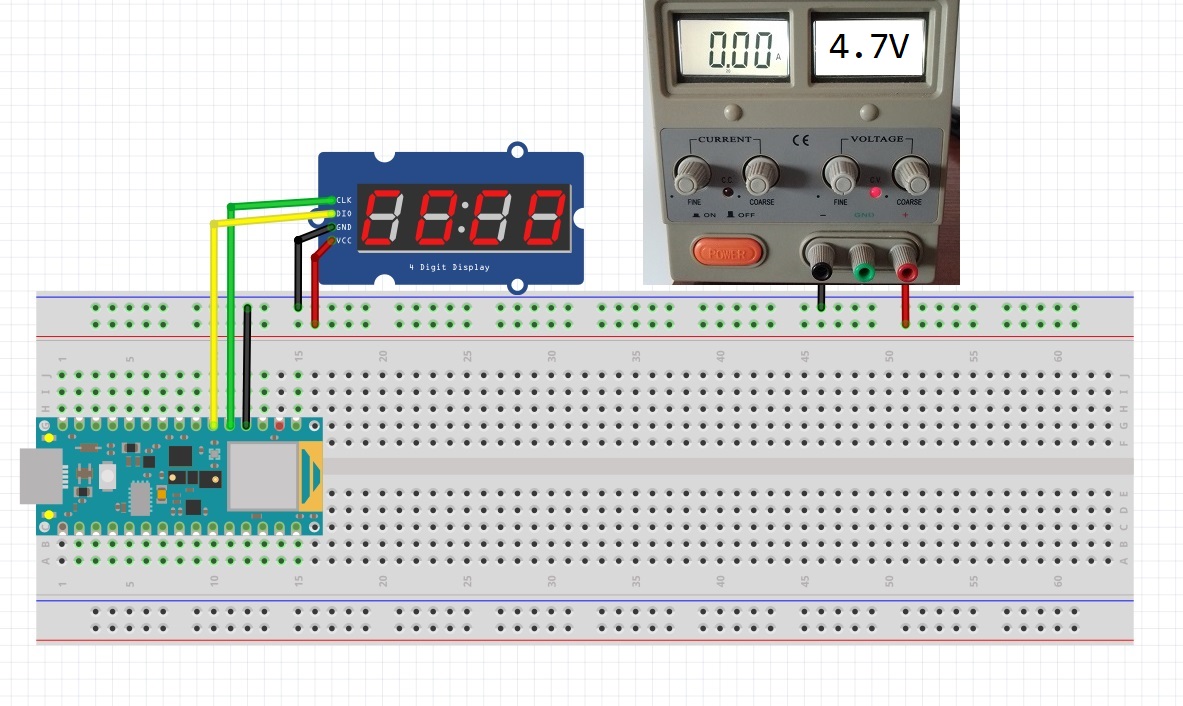
Connect these pins to your Arduino Nano 33 BLE Sense as follows:
- Connect VCC to a +4.7V External Regulated Power Supply (or to 5V on the Arduino <- not recommended because this Arduino is only 3.3v logic tolerant, we can see this on the tm1637 Datasheet that the logic value is 0.7*VCC witch give us approx. +3.3v of Logic Level Voltage and this is OK if we don´t want to burn the Little Guy)
- Connect GND/Global to a ground pin on the Arduino
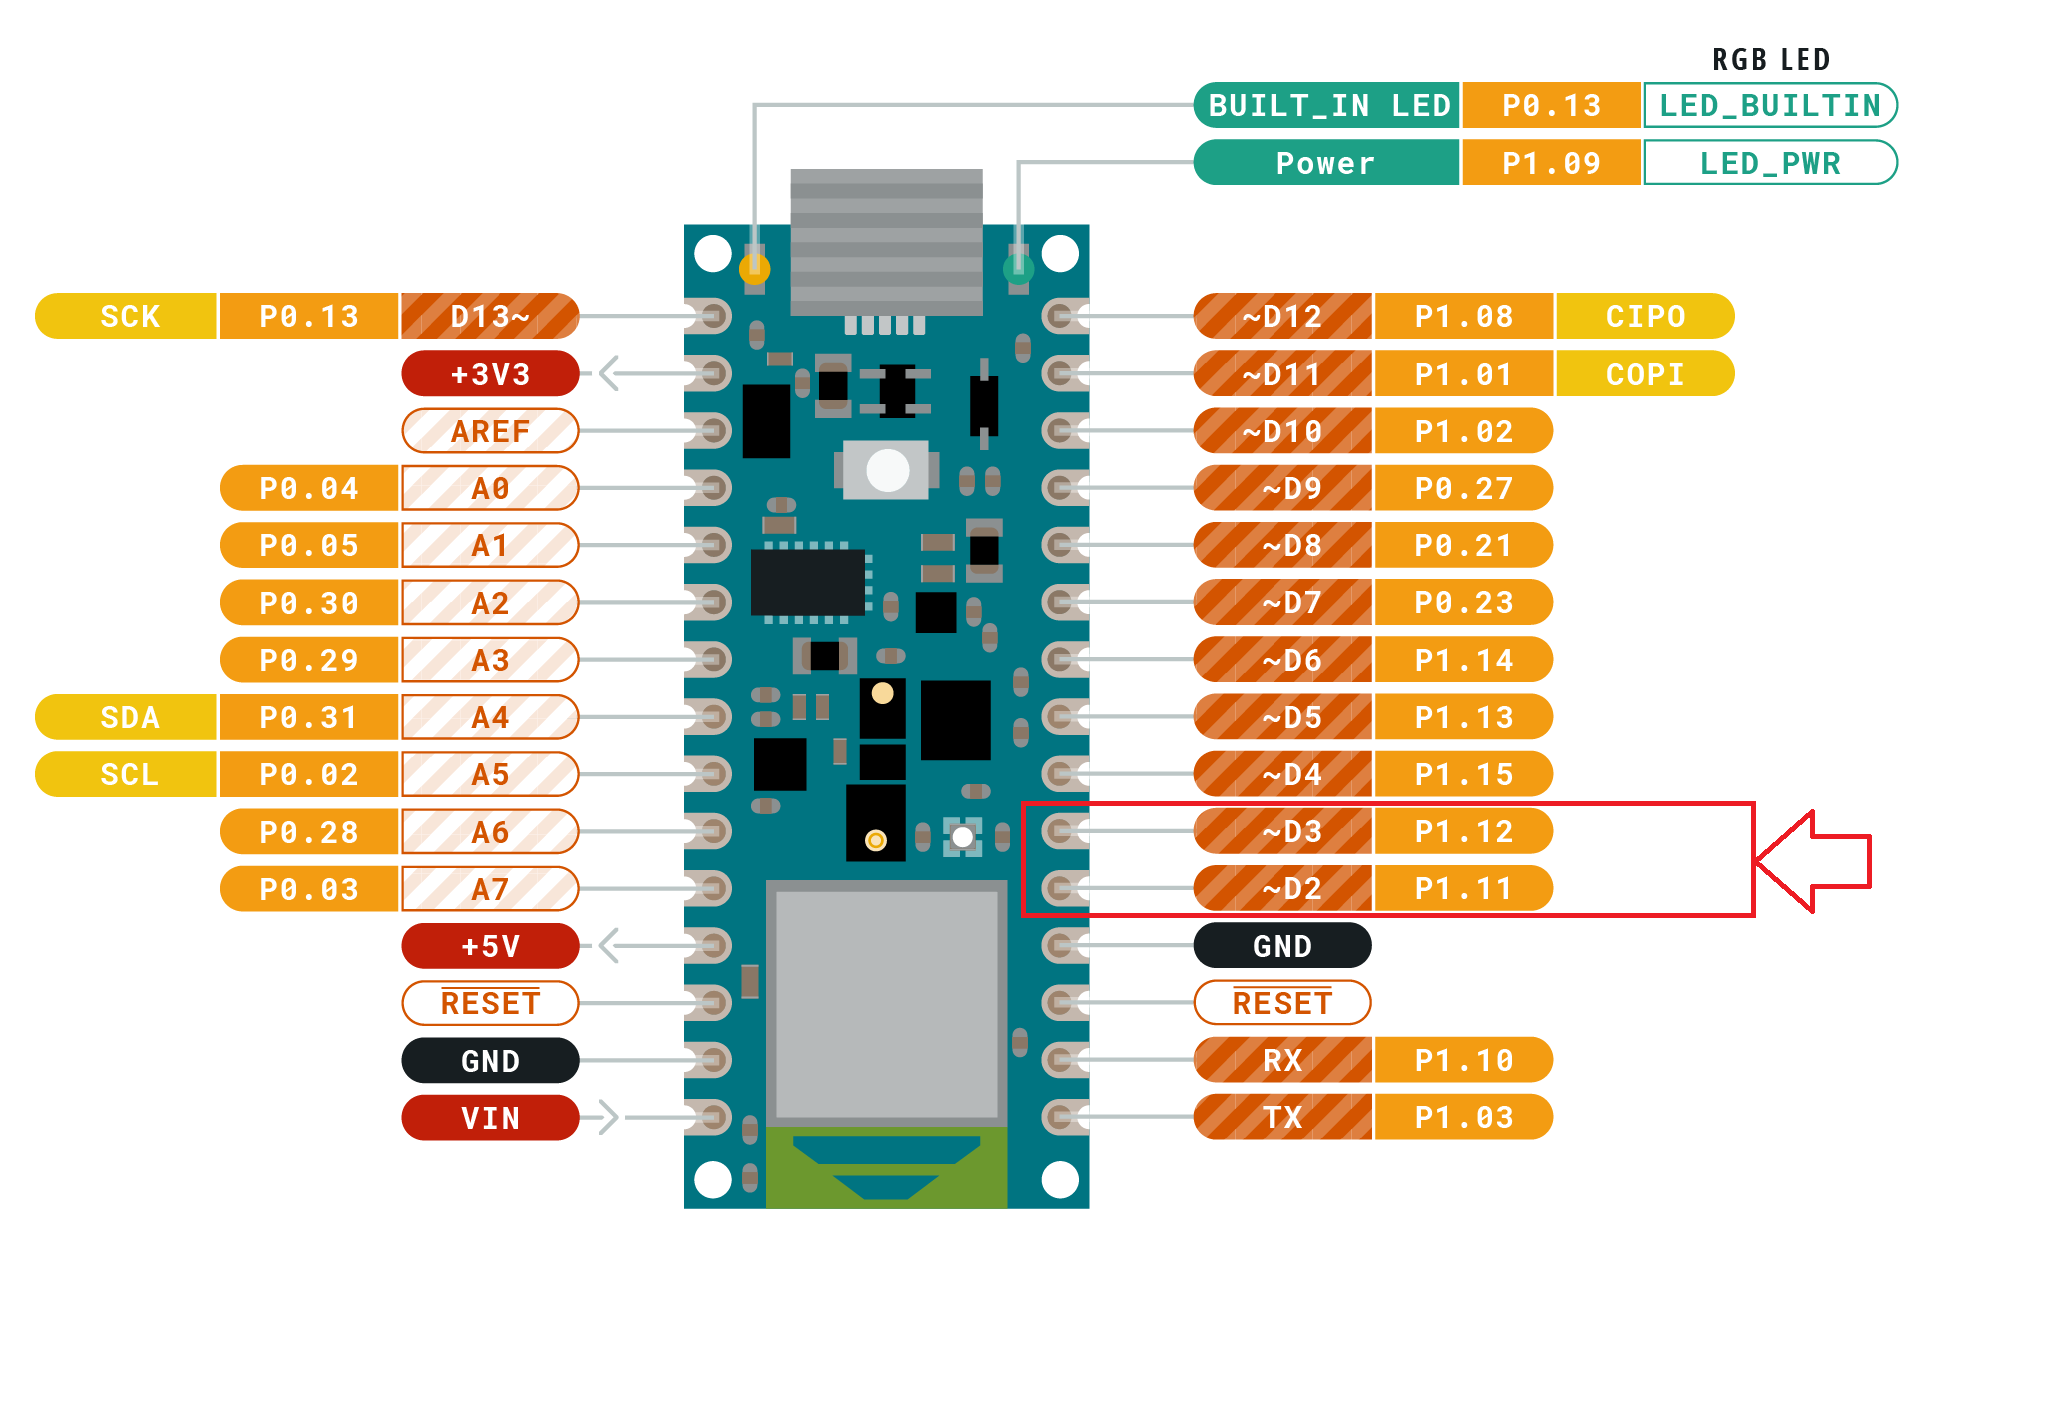
- Connect CLK to digital pin 2 on the Arduino
- Connect DIO to digital pin 3 on the Arduino
Step 2: Install the TM1637 Library
Next, we’ll need to install a library to interface with the TM1637. One such library is the TM1637Display library. You can install it via the Arduino IDE:
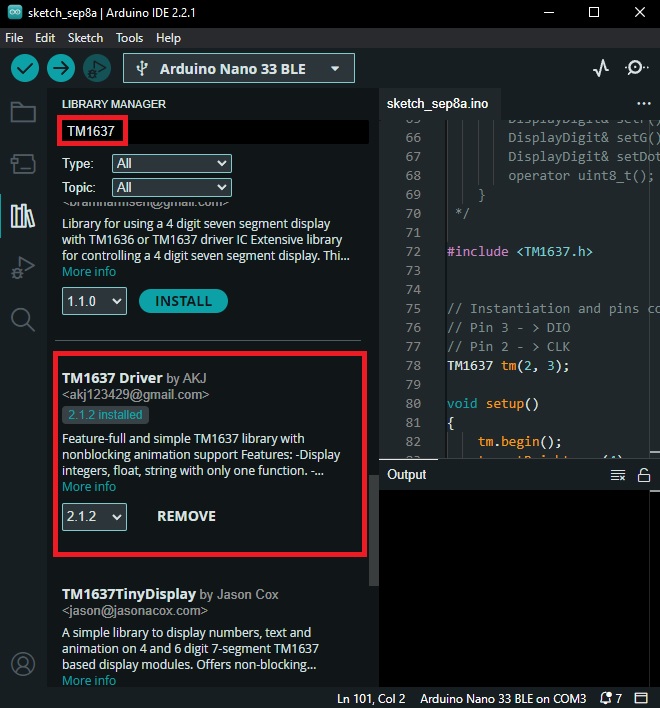
- Go to Sketch > Include Library > Manage Libraries…
- In the Library Manager, type “TM1637” into the search box.
- Click on “TM1637 Driver” by AKJ and click “Install”.
Step 3: Write the Code
Now that we’ve connected everything and installed the necessary library, we can start writing our code. Let’s create a simple program that displays the number “1234” on the LED display.
#include <TM1637.h>

// Pin 3 - > DIO
// Pin 2 - > CLK
TM1637 tm(2, 3);

void setup()
{
    tm.begin();
}

void loop()
{
    // Display Integers:
    tm.display(1234);
    delay(1000);

    // Display float:
    tm.display(29.65);
    delay(1000);

    // Display String:
    tm.display("COOL");
    delay(1000);
    tm.display("DONE");
    delay(1000);

}
Let’s break down what the code is doing:
- We start by including the
TM1637Display.hlibrary, which allows us to control the TM1637 LED display. - We then define the pins to which we’ve connected the CLK and DIO wires of the TM1637 module.
- We create a
TM1637object calledtm, passing it the CLK and DIO pins. - In the
loop()function, we use thedisplay()function to display an Integer 1234 on the LED display. - In the
loop()function, we use thedisplay()function to display an Float 29.65 on the LED display. - In the
loop()function, we use thedisplay()function to display the String “COOL” on the LED display. - In the
loop()function, we use thedisplay()function to display the String “DONE” on the LED display. - In the end we wait for 4 seconds before repeating the loop.
Step 4: Upload and Run
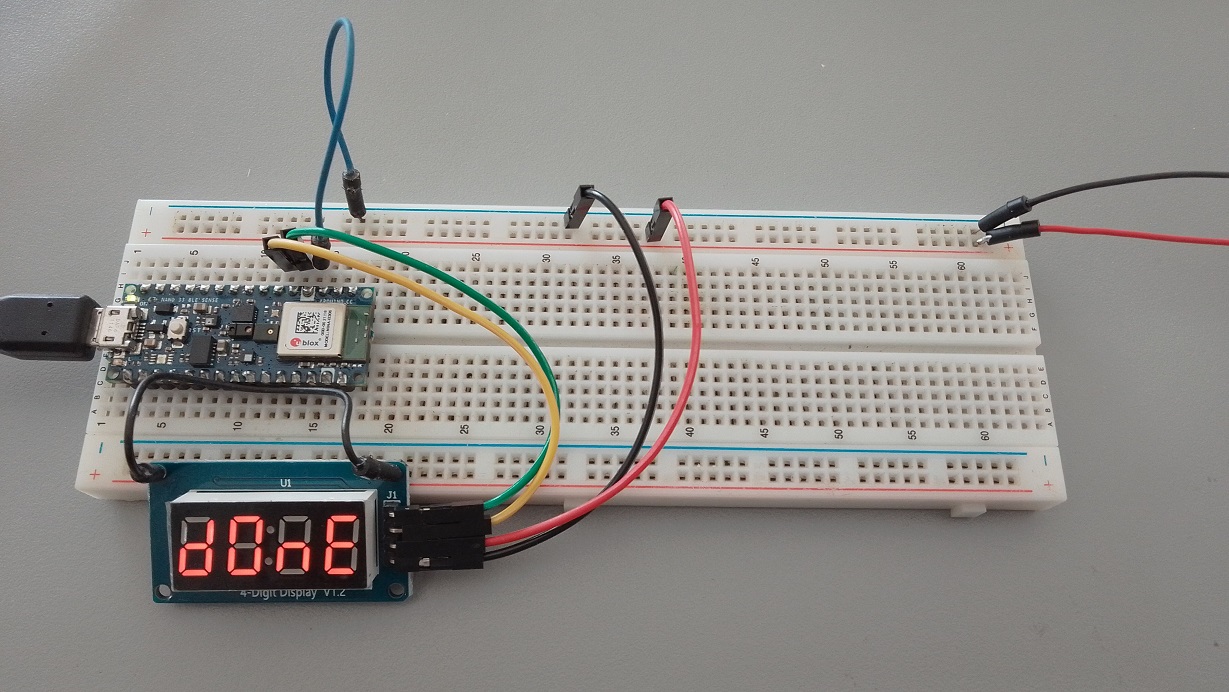
Finally, connect your Arduino Nano 33 BLE Sense to your computer via USB, and upload the code using the Arduino IDE. If everything is connected correctly, you should see the numbers and strings displayed on the LED display.

Conclusion
Interfacing a TM1637 4-digit LED display with an Arduino Nano 33 BLE Sense is a straightforward process, thanks to the TM1637Display library. This setup allows you to display a wide range of information, from sensor readings to time and much more.