How to Get the IP Address of an ESP-01
The ESP-01 WiFi module is a versatile component widely used in IoT projects. To fully harness its capabilities, you need to establish communication with it, and one crucial piece of information you’ll need is its IP address. In this blog post, we’ll guide you through obtaining the IP address of an ESP-01 module and show you how to make it continuously repeat the IP address every 1 second. This can be invaluable for monitoring your ESP-01 in real-time or debugging network-related issues.
Prerequisites
- ESP-01 Module (Affiliate) – https://s.click.aliexpress.com/e/_DETsfWR
- USB ESP-01 Programming Adapter with a CH340G chip (Affiliate) – https://s.click.aliexpress.com/e/_DETsfWR
- Computer with Arduino IDE installed
Setting Up the Arduino IDE for ESP8266
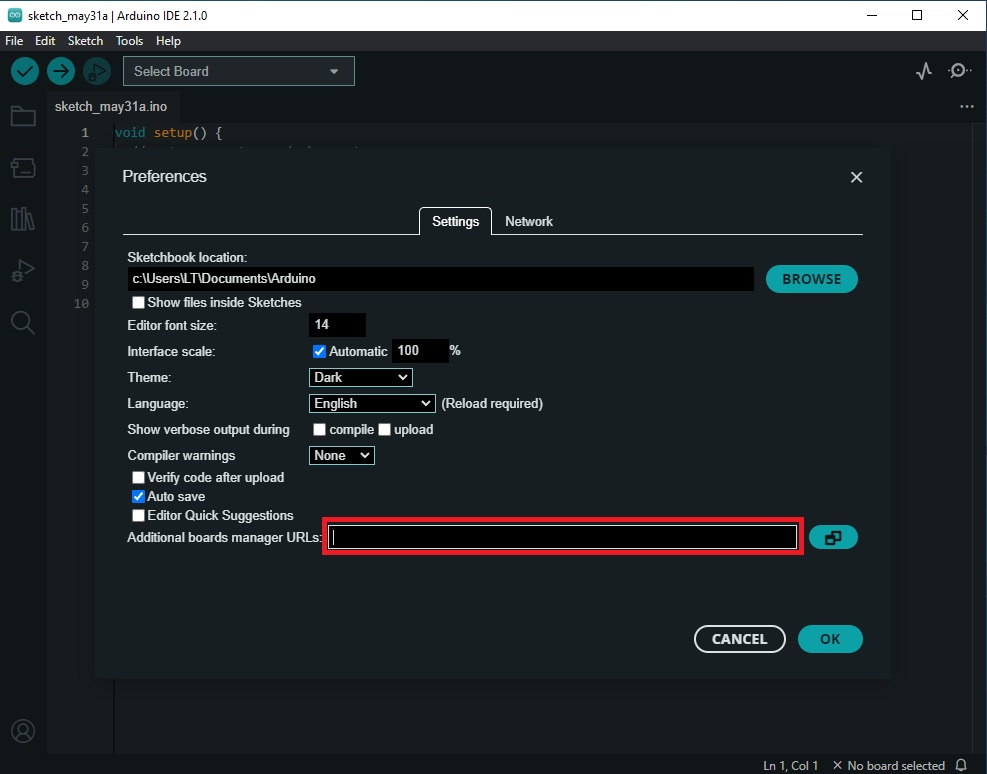
- Open Arduino IDE, go to File -> Preferences.
- In the Additional Boards Manager URLs field, enter: http://arduino.esp8266.com/stable/package_esp8266com_index.json and click OK.


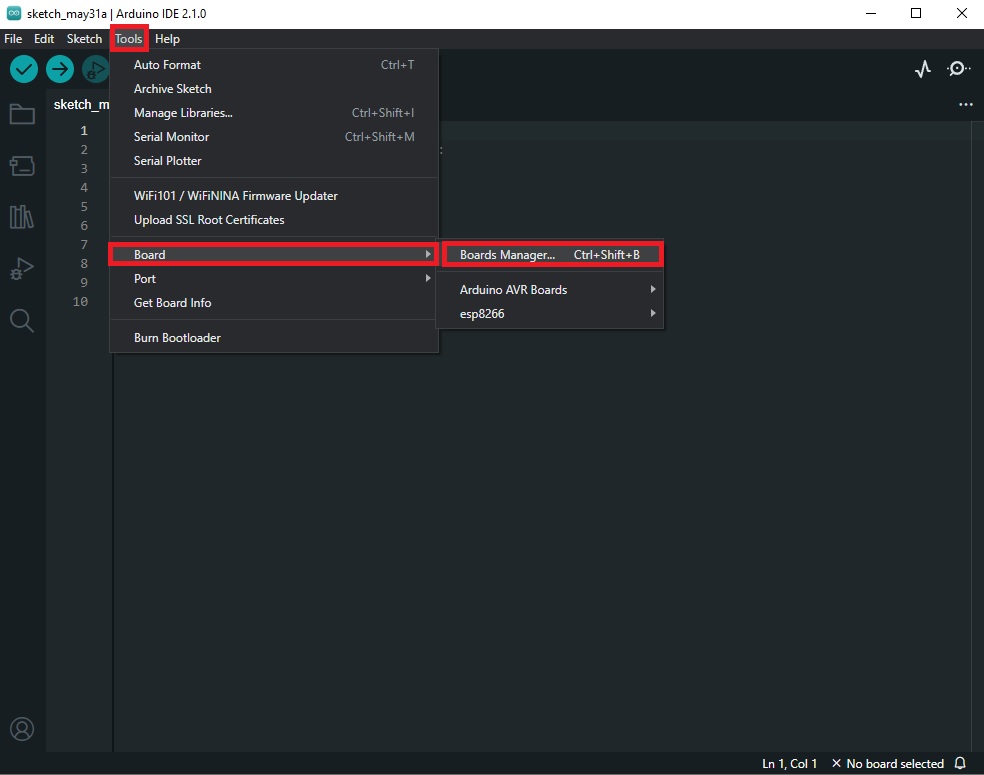
- Go to Tools -> Board -> Boards Manager, search for ESP8266 and install it.

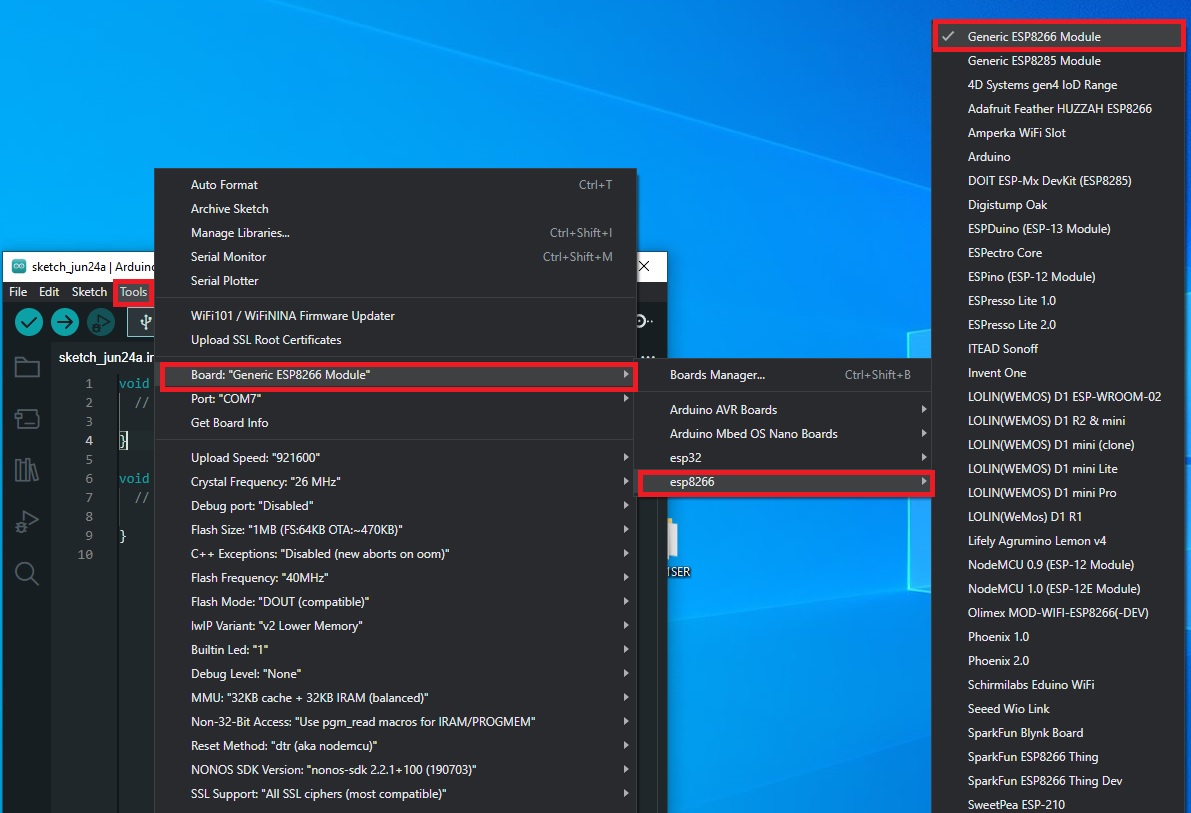
Selecting the correct ESP8266 board:
- Go to
Tools>Board. - Find and select your specific board that is the Generic Esp8266
Setting Up the Hardware
To put the CH340G adapter in programming mode, follow these steps:
- Before plugging the USB ESP-01 programming adapter into a USB port on your computer, Press and hold the push button switch that you soldered in Step 2 for a few seconds.
- Plug the USB ESP-01 programming adapter into a USB port on your computer with the button pressed.
- Release the button: After a few seconds, release the push button switch. The Esp-01 should be in programming mode, and you can upload code to the ESP-01 module using your preferred development environment.
If having trouble, go to my previous blog post. It explains with images: https://www.edgemicrotech.com/preparing-the-usb-esp-01-programming-adapter-a-step-by-step-guide/
Step 5: Modify and Upload the Sketch
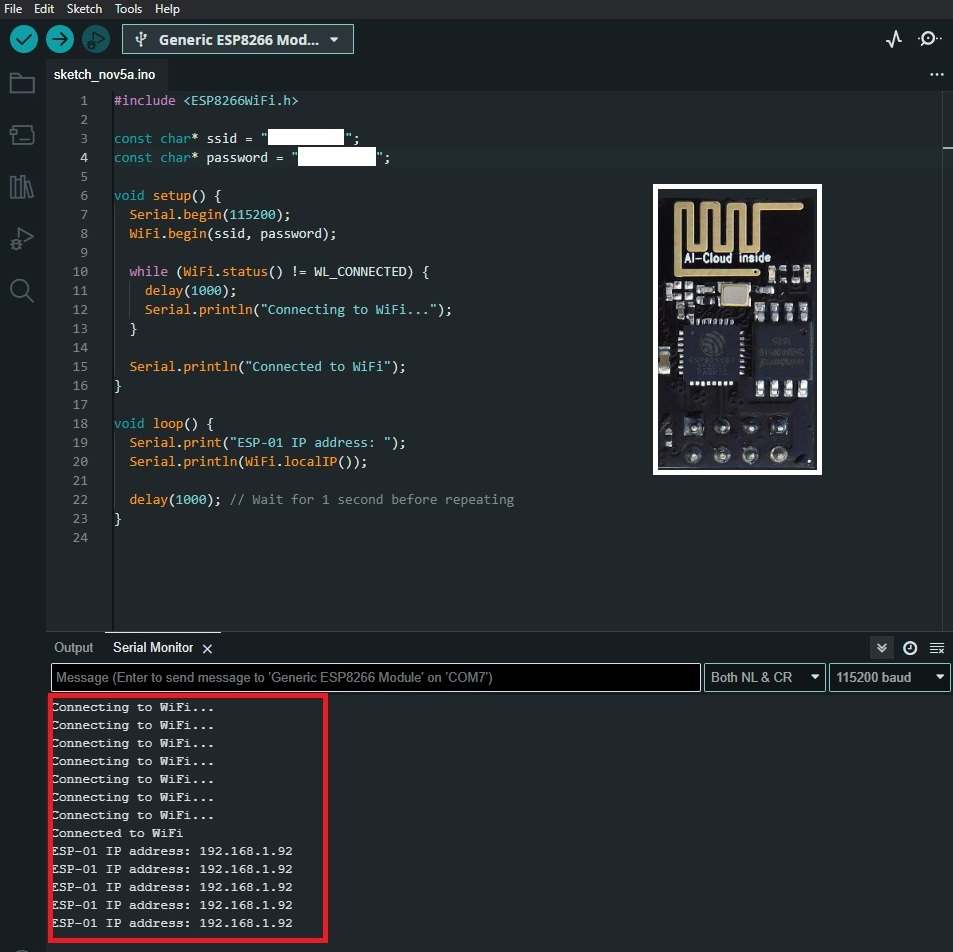
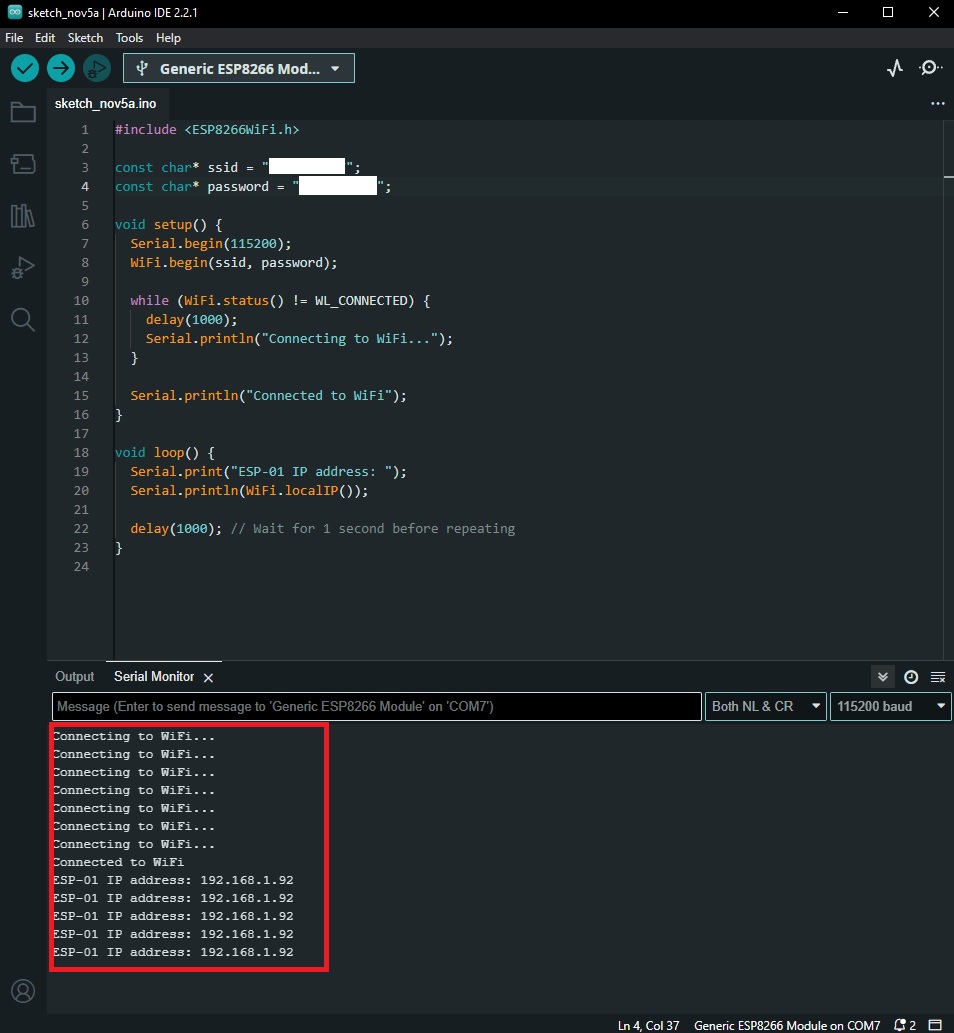
Now, let’s modify the code to continuously print the ESP-01’s IP address every 1 second. Here’s the updated sketch:
#include <ESP8266WiFi.h>

const char* ssid = "Your_SSID";
const char* password = "Your_PASSWORD";

void setup() {
  Serial.begin(115200);
  WiFi.begin(ssid, password);

  while (WiFi.status() != WL_CONNECTED) {
    delay(1000);
    Serial.println("Connecting to WiFi...");
  }

  Serial.println("Connected to WiFi");
}

void loop() {
  Serial.print("ESP-01 IP address: ");
  Serial.println(WiFi.localIP());

  delay(1000); // Wait for 1 second before repeating
}
Ensure you replace “Your_SSID” and “Your_PASSWORD” with your WiFi network credentials. After modifying the code, upload it to your ESP-01 module.
Monitor the Serial Output:
After uploading the sketch, remove the board and connect it again, open the Serial Monitor in the Arduino IDE. You will observe the ESP-01 connecting to the WiFi network and repeatedly printing its IP address every 1 second. This real-time feedback can be highly beneficial for monitoring and debugging purposes.
Once you have obtained the IP address of your ESP-01 module, save it, and you can use it to communicate with the module over your network. Here are a few common use cases:
- Accessing a Web Server on the ESP-01:If your ESP-01 is running a web server, you can access it by entering the IP address in a web browser. For example, if the IP address is
192.168.1.100, you can typehttp://192.168.1.100in the browser’s address bar. This will allow you to interact with the web server and access any web pages or services hosted on the ESP-01. - Sending Commands or Data to the ESP-01:You can use the IP address to send commands or data to your ESP-01 module from another device or application on the same network. This can be achieved through various communication protocols such as HTTP, MQTT, or custom protocols depending on your specific application.
- Monitoring and Logging:If your ESP-01 is equipped with sensors or other data sources, you can use the IP address to remotely monitor and log data. This is particularly useful for IoT applications where you want to collect and analyze data from your ESP-01 module.
- Remote Control:If your ESP-01 is controlling devices or systems, you can use the IP address to remotely control those devices. This might involve sending commands to the ESP-01 to turn on/off lights, motors, or any other connected devices.
- Updating Firmware Over-the-Air (OTA):The IP address can be used for over-the-air updates of your ESP-01’s firmware. This allows you to update the code on the module without physically connecting it to your computer. This is especially useful for devices that are deployed in remote locations.
Troubleshooting:
While obtaining the IP address of your ESP-01 module is straightforward, you may encounter some common issues. Here are a few troubleshooting tips:
- No IP address is printed to the serial monitor: Make sure the baud rate of the serial monitor matches the baud rate specified in the Serial.begin() function in your code (115200 in the example code)
- WiFi Connection Problems: If the module can’t connect to your WiFi network, verify that the SSID and password are correctly entered in the sketch. Additionally, ensure your network is working and within range.
- Inconsistent IP Address: If the IP address seems to change or is not consistent, check your router’s DHCP settings. You may want to set up a static IP address for your ESP-01 to ensure consistency.
Conclusion:
Obtaining the IP address of an ESP-01 WiFi module is an essential step in setting up your IoT projects. With the guidance provided in this blog post, you can easily retrieve the IP address and continually monitor your ESP-01 module. This real-time feedback is particularly valuable for troubleshooting network issues, ensuring the module’s proper functioning, and enhancing the overall performance of your IoT applications. Start exploring the potential of your ESP-01 module by staying connected to it through its IP address.