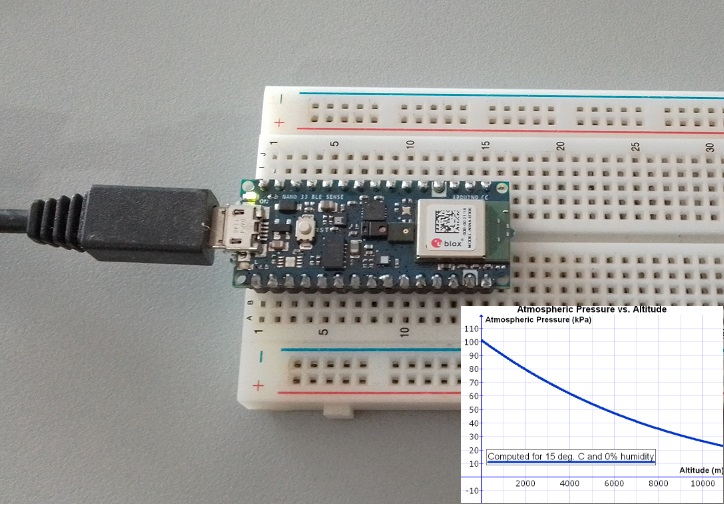
Creating a Barometer with Arduino Nano 33 BLE Sense
In this blog post, we will walk through the process of creating a barometer using the Arduino Nano 33 BLE Sense. This device will allow us to measure atmospheric pressure and calculate the approximate altitude of our location.
Hardware Required
- Arduino Nano 33 BLE Sense
- USB cable for programming and power
Software Required
- Arduino IDE
- Arduino_LPS22HB library
Goodies

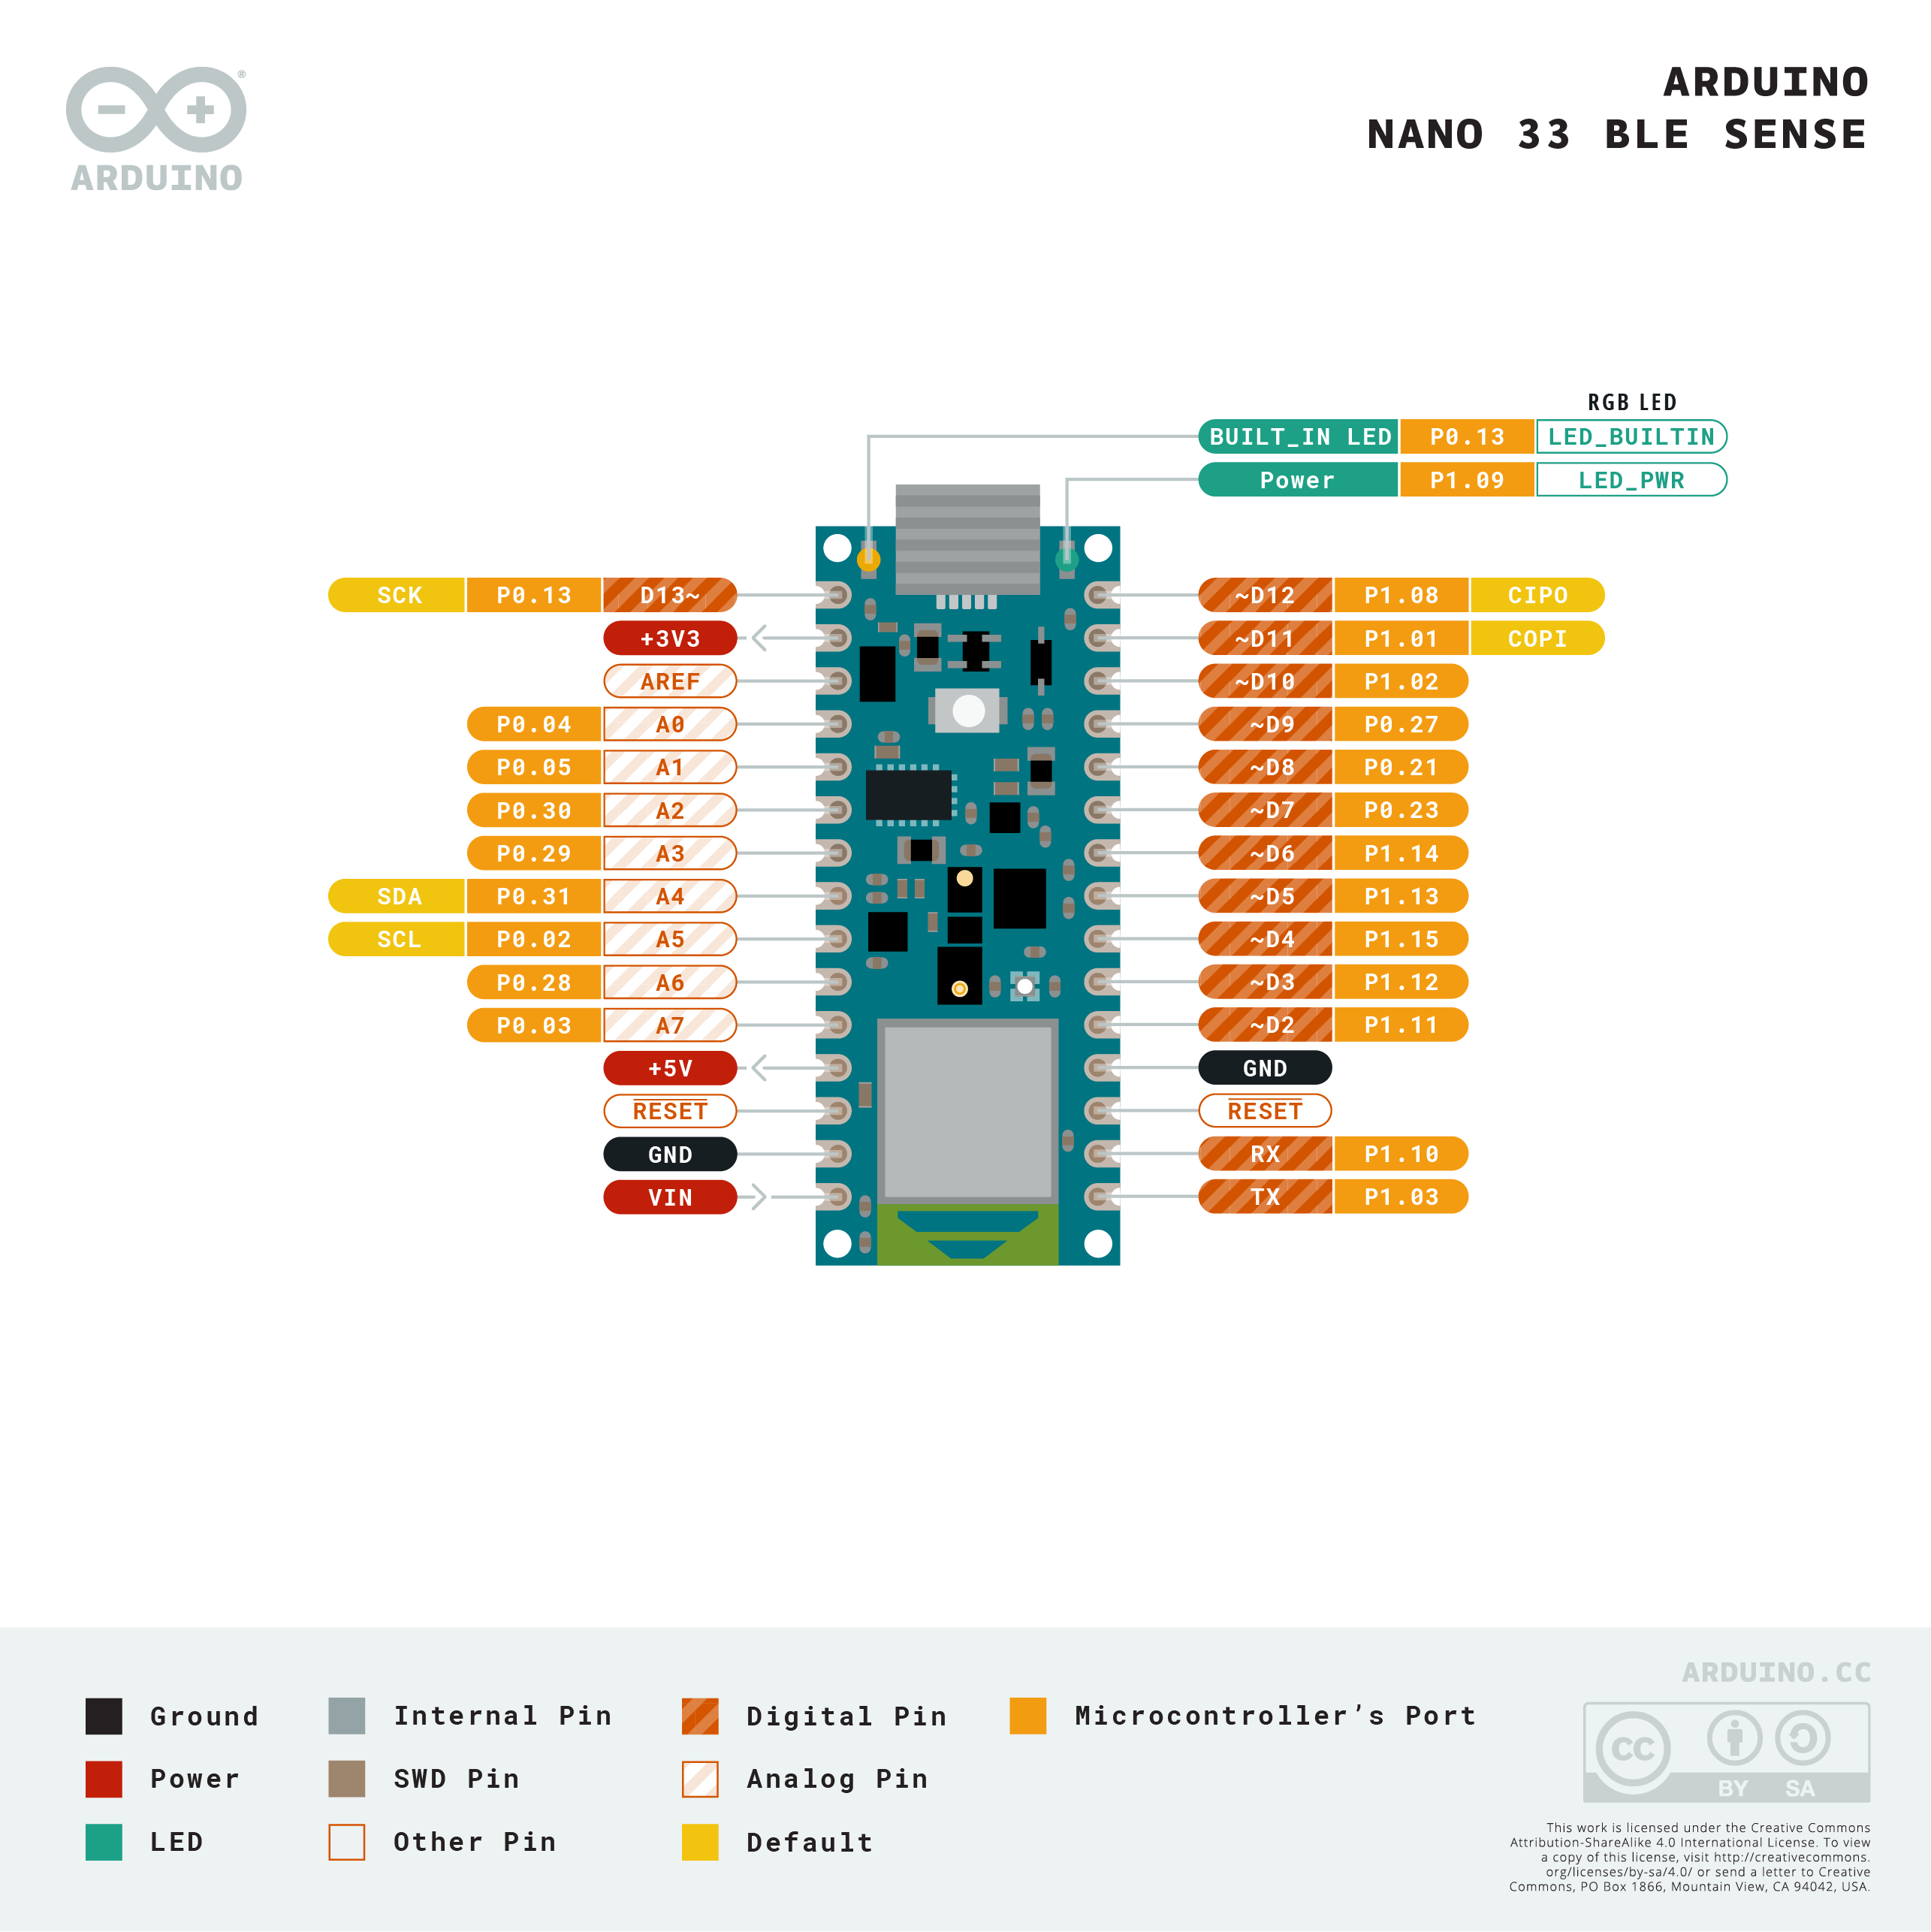
- Pinout
Introduction to HTS221 Sensor
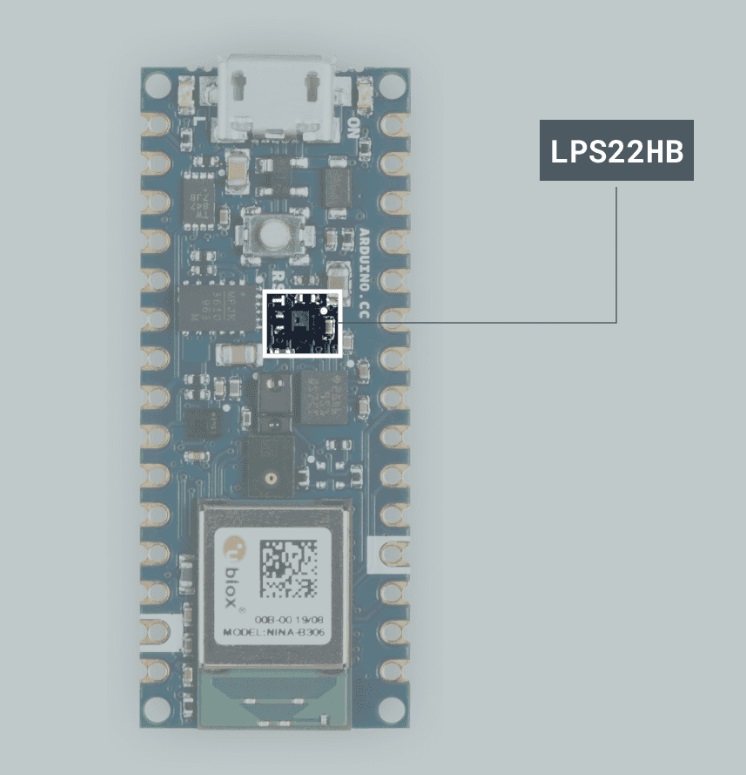
The Arduino Nano 33 BLE Sense board comes equipped with an LPS22HB sensor, which is a piezoresistive absolute pressure sensor.
This sensor is capable of measuring pressures from 260 to 1260 hPa, making it suitable for a wide range of applications, including weather forecasting, altitude estimations, and more.
Setting Up the Arduino IDE
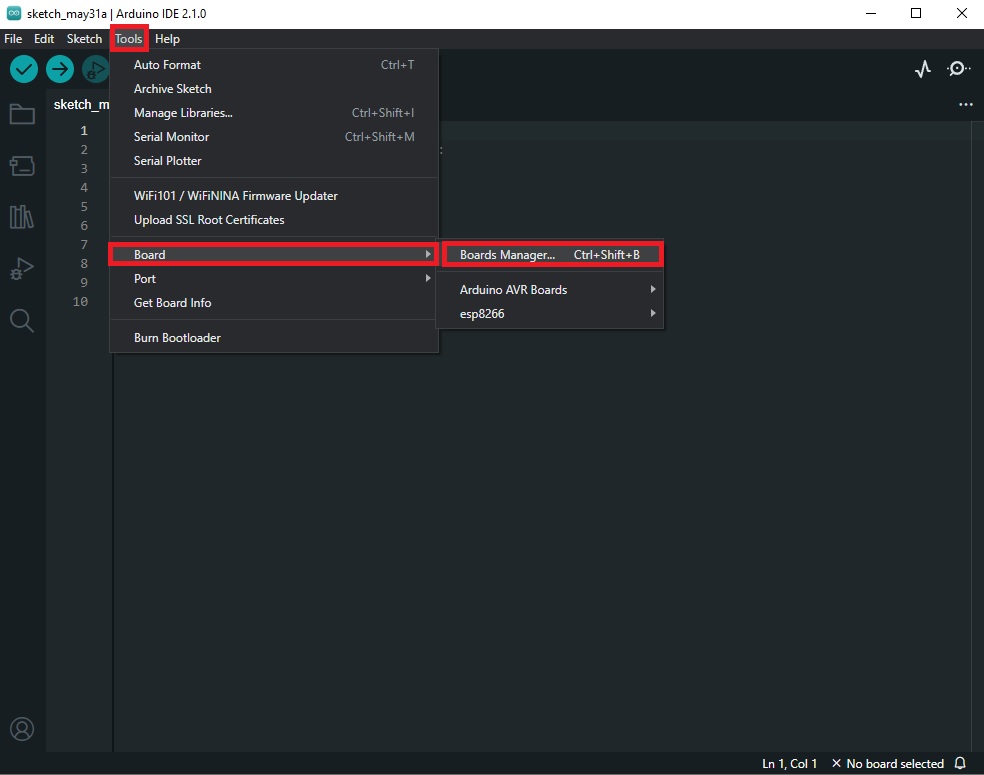
First, you need to set up the Arduino IDE for the Arduino Nano 33 BLE Sense. Open the Arduino IDE and go to Tools > Board > Board Manager. Search for “Arduino Mbed OS Nano Boards” and install it. This will add support for the Arduino Nano 33 BLE Sense board.

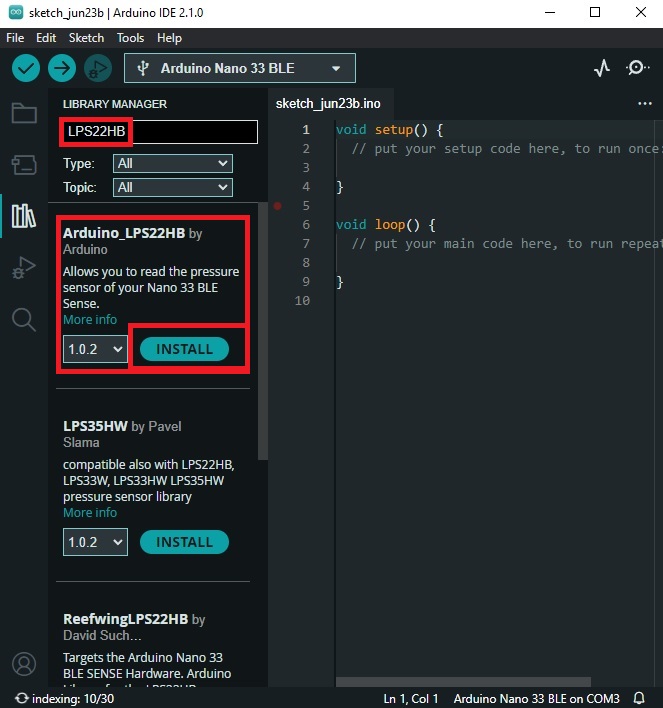
Next, you need to install the Arduino_LPS22HB library. Go to Sketch > Include Library > Manage Libraries. Search for “Arduino_LPS22HB” and install it. This library provides functions for interacting with the LPS22HB pressure sensor on the Arduino Nano 33 BLE Sense.

Writing the Code
Here is the complete code for the barometer:
#include <Arduino_LPS22HB.h>

void setup() {
  Serial.begin(9600);
  while (!Serial);

  if (!BARO.begin()) {
    Serial.println("Failed to initialize pressure sensor!");
    while (1);
  }
}

void loop() {
  float pressure = BARO.readPressure();
  float altitude = calculateAltitude(pressure);

  Serial.print("Pressure = ");
  Serial.print(pressure);
  Serial.print(" kPa");
  Serial.print("\tAltitude = ");
  Serial.print(altitude);
  Serial.println(" m");

  delay(1000);
}

float calculateAltitude(float pressure) {
  float seaLevelPressure = 101.325; // kPa
  return 44330.0 * (1.0 - pow(pressure / seaLevelPressure, 0.1903));
}
- In the setup() function, we initialize the serial communication and the pressure sensor. If the sensor fails to initialize, the program will halt with an error message.
- In the loop() function, we read the pressure from the sensor, calculate the altitude, and print these values to the serial monitor.
- The delay(1000) function pauses the program for one second before the next reading.
The calculateAltitude() function uses the formula for calculating altitude from atmospheric pressure:
float calculateAltitude(float pressure) {
  float seaLevelPressure = 101.325; // kPa
  return 44330.0 * (1.0 - pow(pressure / seaLevelPressure, 0.1903));
}
- This function takes the measured pressure as an argument and returns the calculated altitude. The formula used is a standard formula for converting atmospheric pressure to altitude.
Uploading the Code
- Connect the Arduino Nano 33 BLE Sense to your computer with the USB cable. In the Arduino IDE, go to Tools > Board and select “Arduino Nano 33 BLE”. Then go to Tools > Port and select the port that the Arduino is connected to.
- Click the Upload button (the right arrow in the top left corner of the IDE). The code will compile and upload to the Arduino. If there are any errors, they will be displayed in the console at the bottom of the IDE.
Testing the Barometer
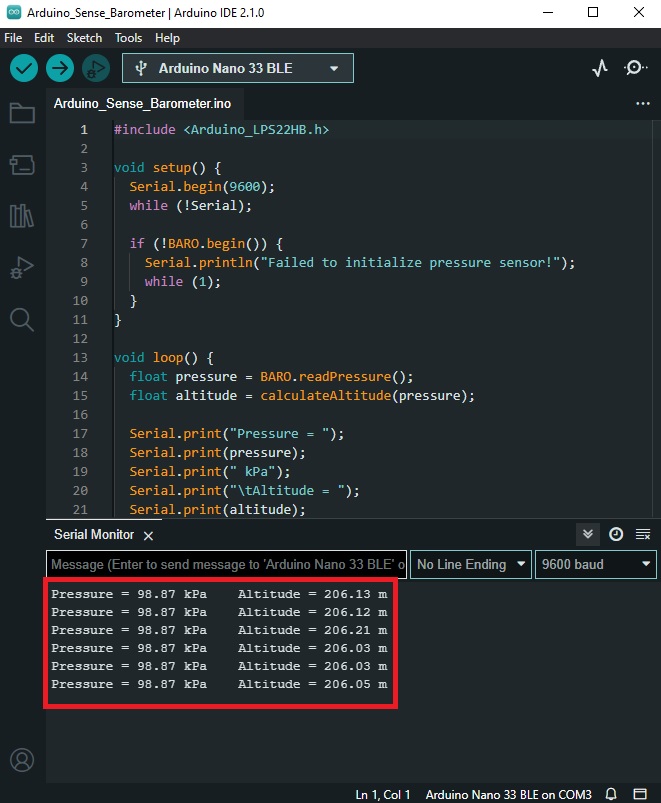
Open the Serial Monitor by going to Tools > Serial Monitor. You should see the pressure and altitude values being printed every second. If you move the Arduino up and down, you should see the altitude value change.
Calibration
The barometer is calibrated at sea level to read 101.325 kPa. If you are not at sea level, you may need to adjust the seaLevelPressure variable in the calculateAltitude() function to match the actual sea level pressure at your location. You can find this information from a local weather station or online weather service.
Conclusion
In this blog post, we have shown how to create a barometer using the Arduino Nano 33 BLE Sense. This device can measure atmospheric pressure and calculate the approximate altitude of its location. With this knowledge, you can now explore other applications of the Arduino Nano 33 BLE Sense and its onboard sensors. Happy coding!
