Countdown Timer with Esp8266 + TM1637 and Encoder
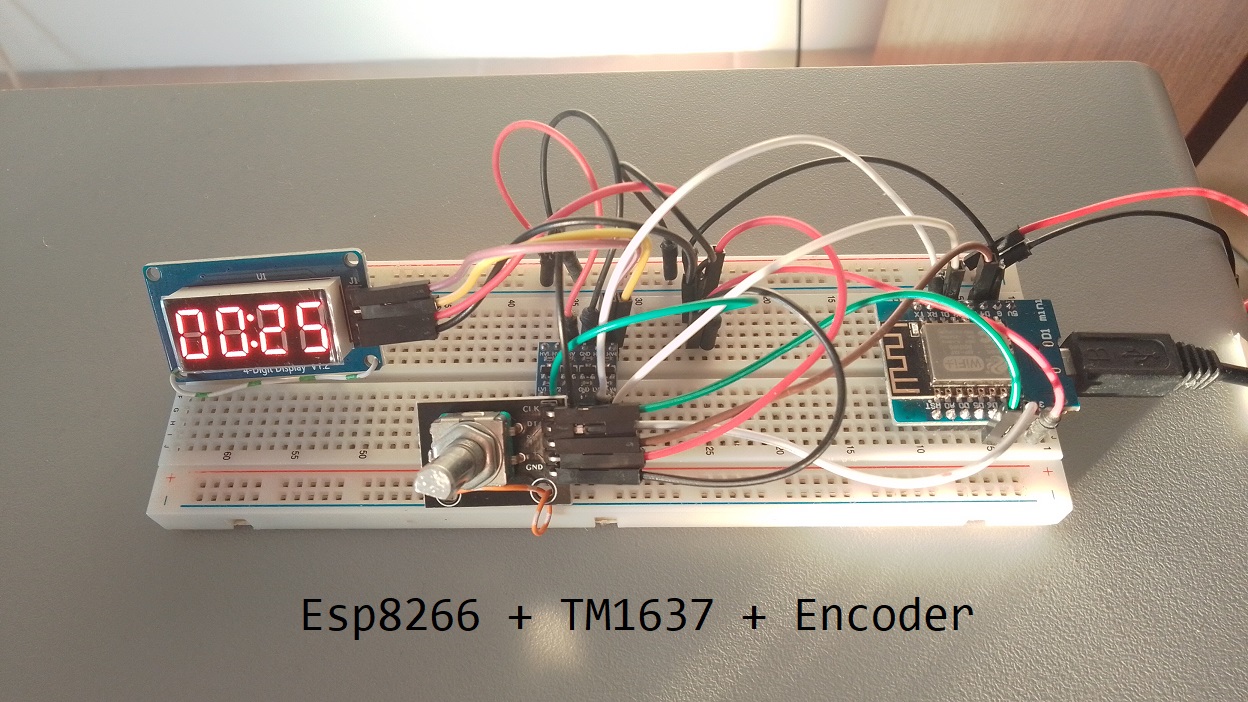
In this tutorial, we’ll guide you through the process of creating a versatile and interactive countdown timer using a Wemos D1 Mini, a TM1637 4-digit 7-segment display, and a KY-040 rotary encoder. This project is not only a great way to learn about Arduino programming but also provides a practical application for everyday scenarios like cooking, workouts, or any activity that requires precise timing.
Components You’ll Need:
- ESP8266 Development Board (such as NodeMCU) (Affiliate) – https://s.click.aliexpress.com/e/_DD3JQhj
- TM1637 display module (Affiliate) – https://s.click.aliexpress.com/e/_DCwvPgx
- KY-040 rotary encoder (Affiliate) – https://s.click.aliexpress.com/e/_Dl3uGHB
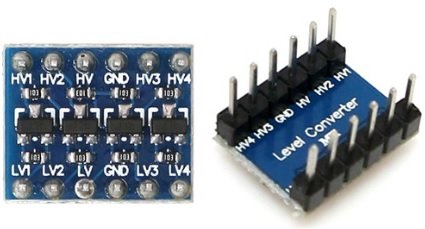
- Logic Converter (Affiliate) – https://s.click.aliexpress.com/e/_Dmx9x5D
- Breadboard and jumper wires (Affiliate) – https://s.click.aliexpress.com/e/_Dl5kuk1
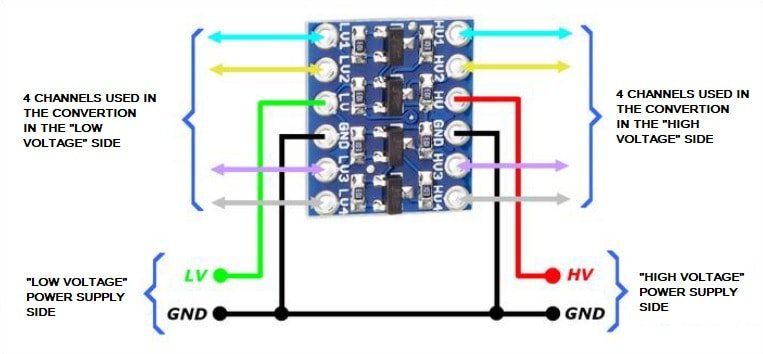
Understanding the Logic Level Conversion
The Wemos D1 Mini operates at 3.3V, while the TM1637 typically works at 5V. To bridge this voltage gap, we’ll use a logic level converter to ensure proper communication between the devices.
Setting Up the Hardware:
Begin by connecting the components as follows:
- Connect the CLK pin of the KY-040 encoder to D6 on the Wemos D1 Mini.
- Connect the DT pin of the KY-040 encoder to D7 on the Wemos D1 Mini.
- Connect the SW pin of the KY-040 encoder to D4 on the Wemos D1 Mini.
- Connect the DIO pin of the TM1637 display to D2 on the Wemos D1 Mini.
- Connect the CLK pin of the TM1637 display to D1 on the Wemos D1 Mini.

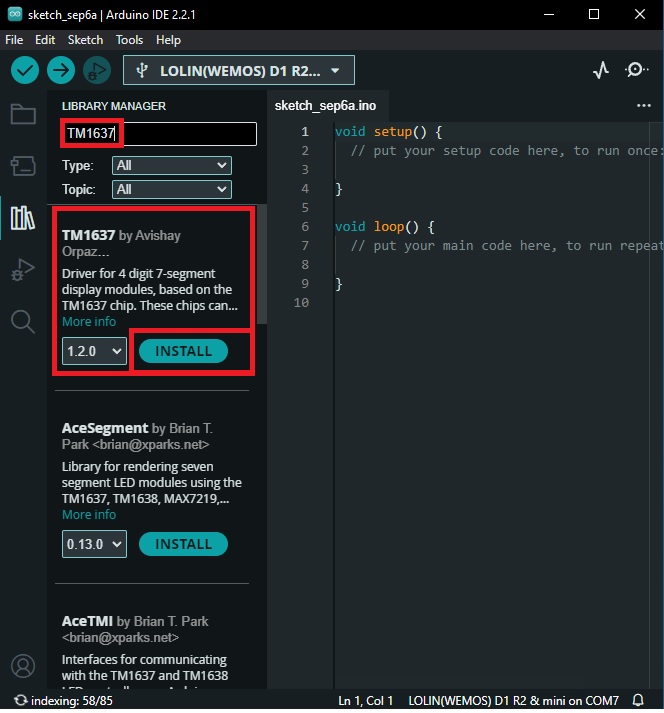
Installing the Required Library:
Open the Arduino IDE, go to “Sketch” → “Include Library” → “Manage Libraries” and search for “TM1637”.
- Install the library authored by “Avishay” latest version
The code
Variable Declarations:
int encoderValue = 0;
int lastCLKState;
int lastDTState;
bool buttonPressed = false;
bool timerRunning = false;
unsigned long countdownStartTime;
unsigned long countdownDuration = 0;
int lastDisplayedValue = -1;
Setting Up the Display in the Setup Function:
void setup() {
  pinMode(CLK, INPUT);
  pinMode(DT, INPUT);
  pinMode(SW, INPUT_PULLUP);

  lastCLKState = digitalRead(CLK);
  lastDTState = digitalRead(DT);

  Serial.begin(115200);
  display.setBrightness(7);
  display.showNumberDec(0);
}
The setup function initializes the pins, sets up the serial communication for debugging, and initializes the TM1637 display.
Loop Function – Handling Encoder and Timer Logic:
void loop() {
  int currentStateCLK = digitalRead(CLK);
  int currentStateDT = digitalRead(DT);

  if (currentStateCLK != lastCLKState) {
    if (currentStateCLK == HIGH) {
      if (currentStateDT == LOW) {
        encoderValue++;
      } else {
        encoderValue--;
      }

      if (encoderValue < 0) {
        encoderValue = 0;
      }

      if (encoderValue != lastDisplayedValue) {
        Serial.print("Selected Time: ");
        Serial.println(encoderValue);

        display.showNumberDec(encoderValue, false);
        lastDisplayedValue = encoderValue;
      }
    }
  }

  lastCLKState = currentStateCLK;
  lastDTState = currentStateDT;

  if (timerRunning) {
    unsigned long elapsedTime = millis() - countdownStartTime;

    if (elapsedTime >= countdownDuration * 1000) {
      Serial.println("Countdown complete");
      timerRunning = false;
      Serial.println("Input enabled");

      display.showNumberDec(0, false);
    } else if (elapsedTime % 1000 == 0) {
      int remainingTime = (countdownDuration * 1000 - elapsedTime) / 1000;
      int minutes = remainingTime / 60;
      int seconds = remainingTime % 60;

      Serial.print("Remaining Time: ");
      Serial.print(minutes);
      Serial.print(" minutes and ");
      Serial.print(seconds);
      Serial.println(" seconds");

      display.showNumberDecEx(minutes * 100 + seconds, 0b11100000, true);
    }
  }

  if (digitalRead(SW) == LOW && !buttonPressed && !timerRunning) {
    buttonPressed = true;
    timerRunning = true;
    countdownStartTime = millis();
    countdownDuration = encoderValue * 60;
    lastDisplayedValue = -1;

    Serial.print("Countdown started for ");
    Serial.print(countdownDuration / 60);
    Serial.print(" minutes and ");
    Serial.print(countdownDuration % 60);
    Serial.println(" seconds");
  } else if (digitalRead(SW) == HIGH && buttonPressed) {
    buttonPressed = false;
  }

  delay(1);
}
Complete Code
#include <TM1637Display.h>

const int CLK = D6;
const int DT = D7;
const int SW = D4;
const int DIO = D2;
const int CLK_TM1637 = D1;

TM1637Display display(CLK_TM1637, DIO);

int encoderValue = 0;
int lastCLKState;
int lastDTState;
bool buttonPressed = false;
bool timerRunning = false;
unsigned long countdownStartTime;
unsigned long countdownDuration = 0;
int lastDisplayedValue = -1;

void setup() {
  pinMode(CLK, INPUT);
  pinMode(DT, INPUT);
  pinMode(SW, INPUT_PULLUP);

  lastCLKState = digitalRead(CLK);
  lastDTState = digitalRead(DT);

  Serial.begin(115200);
  display.setBrightness(7);
  display.showNumberDec(0);
}

void loop() {


  int currentStateCLK = digitalRead(CLK);
  int currentStateDT = digitalRead(DT);

  if (currentStateCLK != lastCLKState) {
    if (currentStateCLK == HIGH) {
      // On rising edge of CLK
      if (currentStateDT == LOW) {
        // Clockwise rotation
        encoderValue++;
      } else {
        // Counter-clockwise rotation
        encoderValue--;
      }

      // Ensure encoderValue is not negative
      if (encoderValue < 0) {
        encoderValue = 0;
      }

      if (encoderValue != lastDisplayedValue) {
        Serial.print("Selected Time: ");
        Serial.println(encoderValue);

        // Display selected time on TM1637
        display.showNumberDec(encoderValue, false);
        lastDisplayedValue = encoderValue;
      }
    }
  }

  lastCLKState = currentStateCLK;
  lastDTState = currentStateDT;

  if (timerRunning) {
    unsigned long elapsedTime = millis() - countdownStartTime;

    if (elapsedTime >= countdownDuration * 1000) {
      Serial.println("Countdown complete");
      timerRunning = false;
      Serial.println("Input enabled");

      // Display "done" on TM1637
      display.showNumberDec(0, false);
    } else if (elapsedTime % 1000 == 0) {  // Update display every second
      int remainingTime = (countdownDuration * 1000 - elapsedTime) / 1000;
      int minutes = remainingTime / 60;
      int seconds = remainingTime % 60;

      Serial.print("Remaining Time: ");
      Serial.print(minutes);
      Serial.print(" minutes and ");
      Serial.print(seconds);
      Serial.println(" seconds");

      // Display remaining time on TM1637
      display.showNumberDecEx(minutes * 100 + seconds, 0b11100000, true);
    }
  }

  if (digitalRead(SW) == LOW && !buttonPressed && !timerRunning) {
    buttonPressed = true;
    timerRunning = true;
    countdownStartTime = millis();
    countdownDuration = encoderValue * 60; // Set countdown duration based on encoder value
    lastDisplayedValue = -1; // Reset last displayed value

    Serial.print("Countdown started for ");
    Serial.print(countdownDuration / 60);
    Serial.print(" minutes and ");
    Serial.print(countdownDuration % 60);
    Serial.println(" seconds");
  } else if (digitalRead(SW) == HIGH && buttonPressed) {
    buttonPressed = false;
  }

  delay(1);
}
Testing
Conclusion
The loop function handles encoder input, updates the display, and manages the countdown timer logic based on button presses. The code provides real-time feedback on the selected time and the remaining time during the countdown.