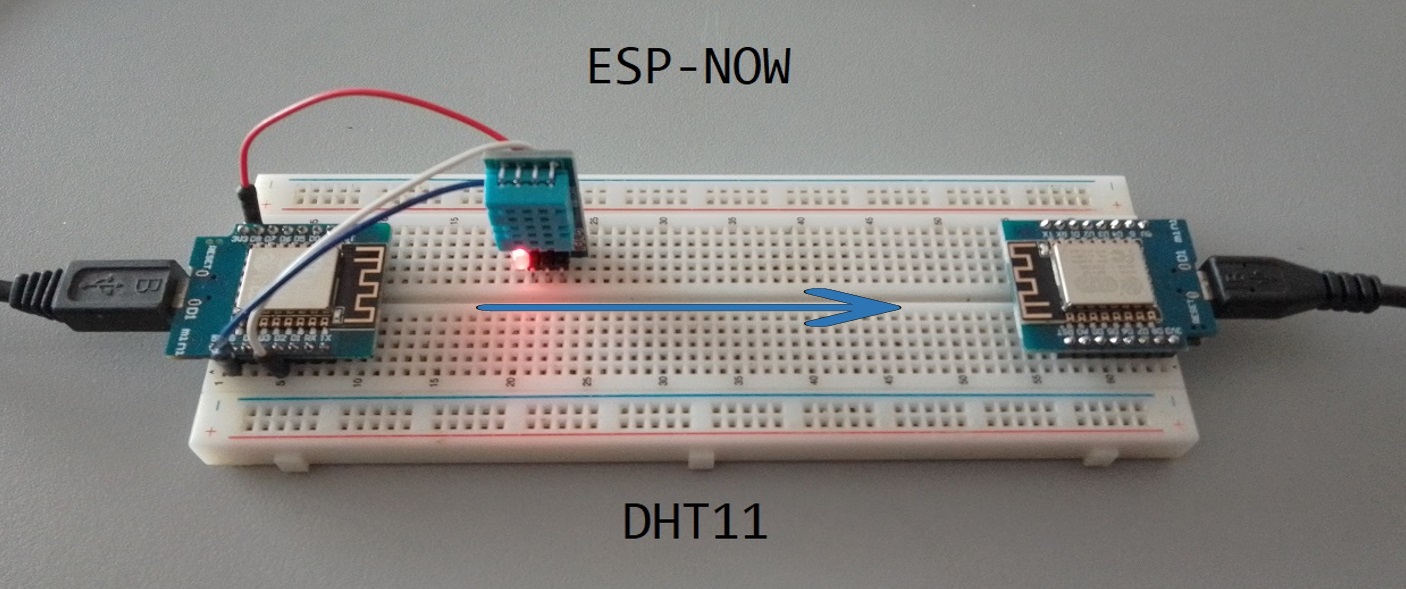
Connecting Two ESP8266 with a DHT11 Sensor via ESP-NOW
In this blog post, we will explore how to connect two ESP8266 modules with a DHT11 temperature and humidity sensor using the ESP-NOW protocol. ESP-NOW is a wireless communication protocol developed by Espressif that enables devices to communicate directly without the need for a Wi-Fi network. This makes it an ideal choice for IoT applications where low power consumption and fast communication are essential.
We will set up one ESP8266 as the sender and the other as the receiver . The sender will read data from the DHT11 sensor and send it to the receiver using ESP-NOW. If the communication fails, we will set a code flag to indicate the issue.
Components
- ESP8266 Development Board (such as NodeMCU) (Affiliate) – https://s.click.aliexpress.com/e/_DD3JQhj
- Breadboard and jumper wires (Affiliate) – https://s.click.aliexpress.com/e/_Dl5kuk1
- DHT11 temperature and humidity sensor (Affiliate) – https://s.click.aliexpress.com/e/_DFb2JzR
- 1x 10k Ohm resistor
Wiring
-
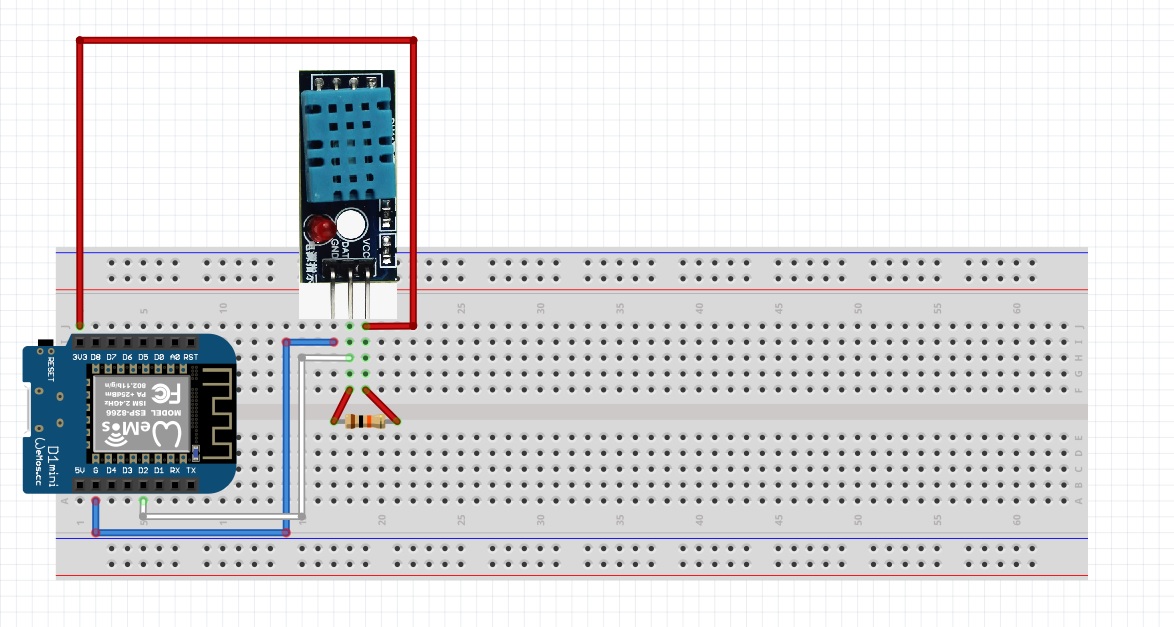
Connect the DHT11 sensor to the master ESP8266 module:
- VCC pin to 3.3V
- GND pin to GND
- Data pin to D2 (GPIO4) with a 10k Ohm pull-up resistor between VCC and Data pin
-
Connect both ESP8266 modules to your computer using USB-to-serial converters for programming.
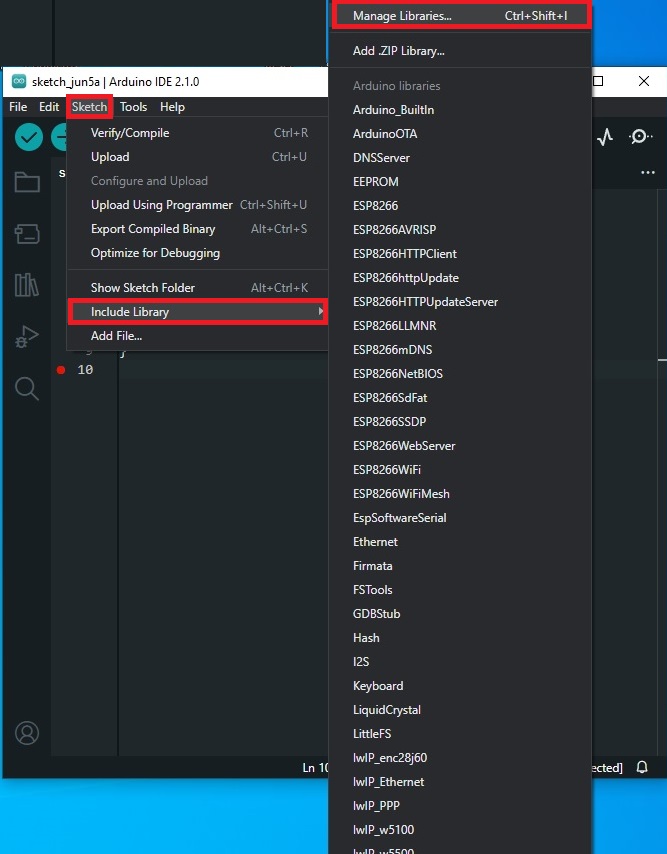
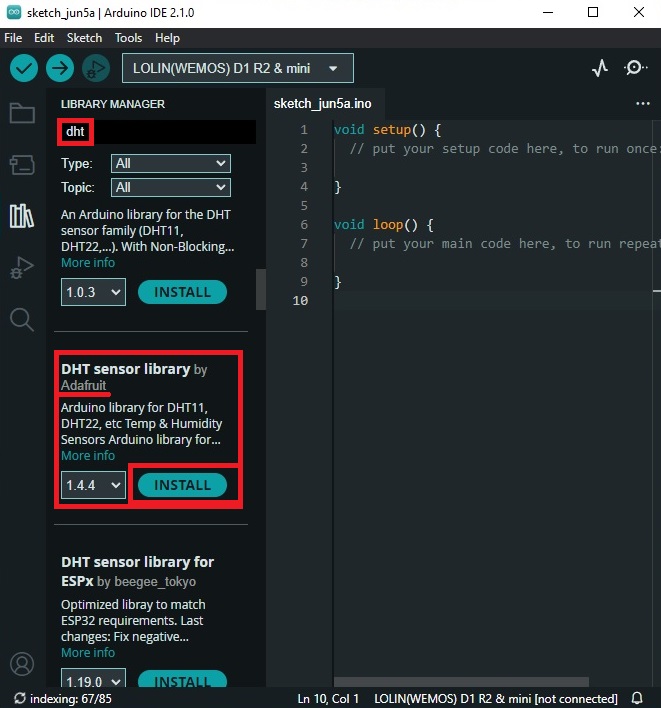
Install the required libraries in the Arduino IDE:
-
- ESP8266 core for Arduino -> My Link to a post that explains this in depth
- Adafruit DHT sensor library
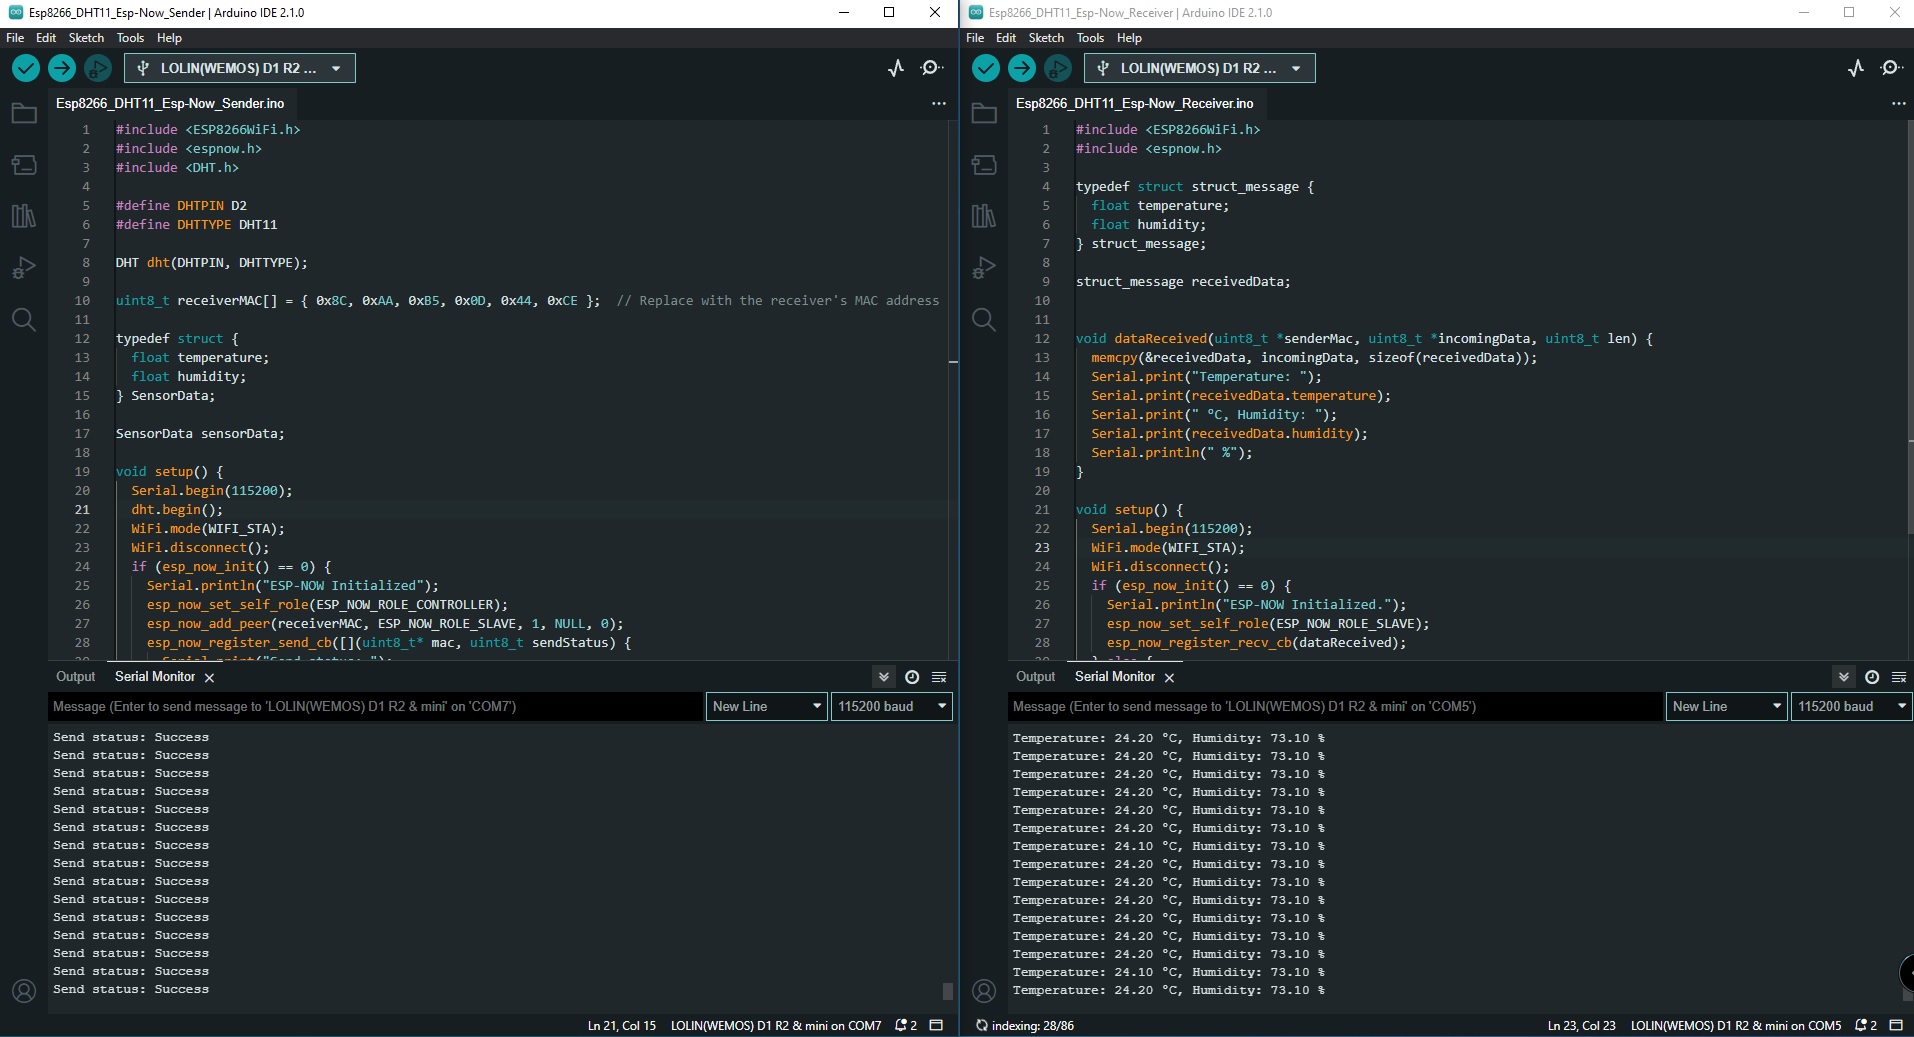
Sender Code
#include <ESP8266WiFi.h>
#include <espnow.h>
#include <DHT.h>

#define DHTPIN D2
#define DHTTYPE DHT11

DHT dht(DHTPIN, DHTTYPE);

uint8_t receiverMAC[] = { 0x8C, 0xAA, 0xB5, 0x0D, 0x44, 0xCE };  // Replace with the receiver's MAC address

typedef struct {
  float temperature;
  float humidity;
} SensorData;

SensorData sensorData;

void setup() {
  Serial.begin(115200);
  dht.begin();
  WiFi.mode(WIFI_STA);
  WiFi.disconnect();
  if (esp_now_init() == 0) {
    Serial.println("ESP-NOW Initialized");
    esp_now_set_self_role(ESP_NOW_ROLE_CONTROLLER);
    esp_now_add_peer(receiverMAC, ESP_NOW_ROLE_SLAVE, 1, NULL, 0);
    esp_now_register_send_cb([](uint8_t* mac, uint8_t sendStatus) {
      Serial.print("Send status: ");
      Serial.println(sendStatus == 0 ? "Success" : "Failed");
    });
  } else {
    Serial.println("ESP-NOW Initialization Failed");
    ESP.restart();
  }
}

void loop() {
  sensorData.temperature = dht.readTemperature();
  sensorData.humidity = dht.readHumidity();
  esp_now_send(receiverMAC, (uint8_t*)&sensorData, sizeof(sensorData));
  delay(2000);
}
Receiver Code
#include <ESP8266WiFi.h>
#include <espnow.h>

typedef struct struct_message {
  float temperature;
  float humidity;
} struct_message;

struct_message receivedData;


void dataReceived(uint8_t *senderMac, uint8_t *incomingData, uint8_t len) {
  memcpy(&receivedData, incomingData, sizeof(receivedData));
  Serial.print("Temperature: ");
  Serial.print(receivedData.temperature);
  Serial.print(" °C, Humidity: ");
  Serial.print(receivedData.humidity);
  Serial.println(" %");
}

void setup() {
  Serial.begin(115200);
  WiFi.mode(WIFI_STA);
  WiFi.disconnect();
  if (esp_now_init() == 0) {
    Serial.println("ESP-NOW Initialized.");
    esp_now_set_self_role(ESP_NOW_ROLE_SLAVE);
    esp_now_register_recv_cb(dataReceived);
  } else {
    Serial.println("ESP-NOW Initialization Failed.");
    ESP.restart();
  }
}

void loop() {
}
- Don’t forget to define the MAC Address of your Receiver in the funtion ->
Testing
After uploading the code, open the Serial Monitor for the receiver ESP8266. You should see the temperature and humidity data received from the sender. If there is a communication error with the DHT11 sensor, you will see an error message.
Conclusion
In this blog post, we have successfully connected two ESP8266 modules with a DHT11 sensor using the ESP-NOW protocol. We have also implemented a code flag to indicate communication errors. This setup can be easily extended to include more sensors or ESP8266 modules for a wide range of IoT applications.