Connecting the BME280 to Wemos D1 Mini
The Wemos D1 Mini is a versatile and compact development board based on the ESP8266 WiFi module. Combining it with the BME280 temperature sensor can provide you with accurate temperature, humidity, and pressure readings. In this guide, we’ll walk you through the process of connecting the BME280 sensor to the Wemos D1 Mini and displaying the sensor data on the Serial Monitor.
Materials Needed:
- ESP8266 Development Board (such as NodeMCU) (Affiliate) – https://s.click.aliexpress.com/e/_DD3JQhj
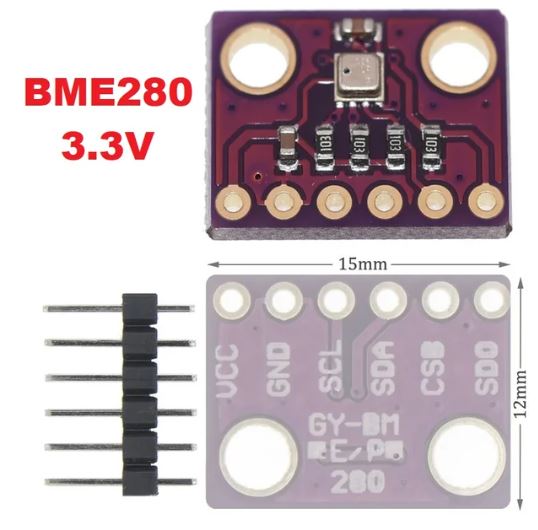
- BME280 Sensor (Affiliate) – https://s.click.aliexpress.com/e/_DEV1mkl
- Breadboard and jumper wires (Affiliate) – https://s.click.aliexpress.com/e/_Dl5kuk1
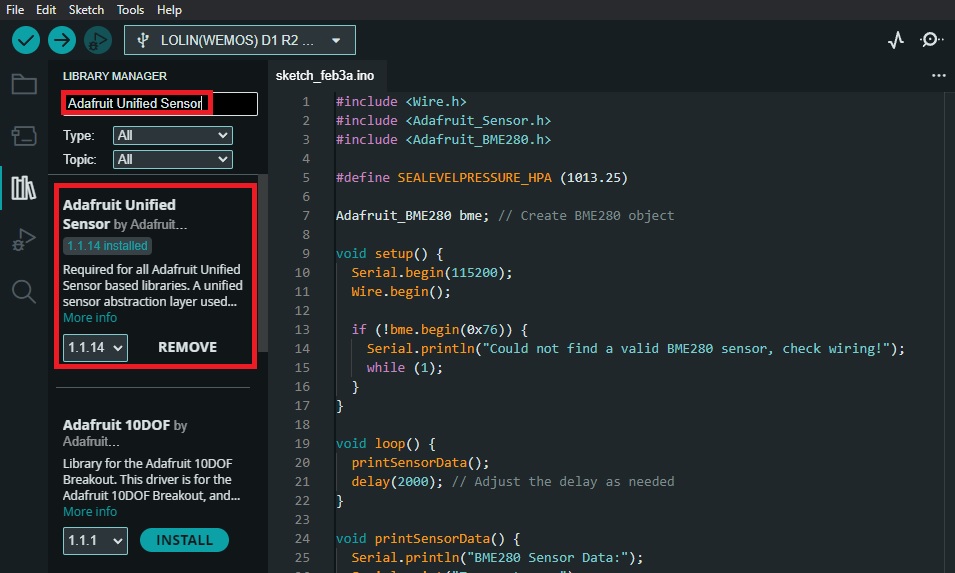
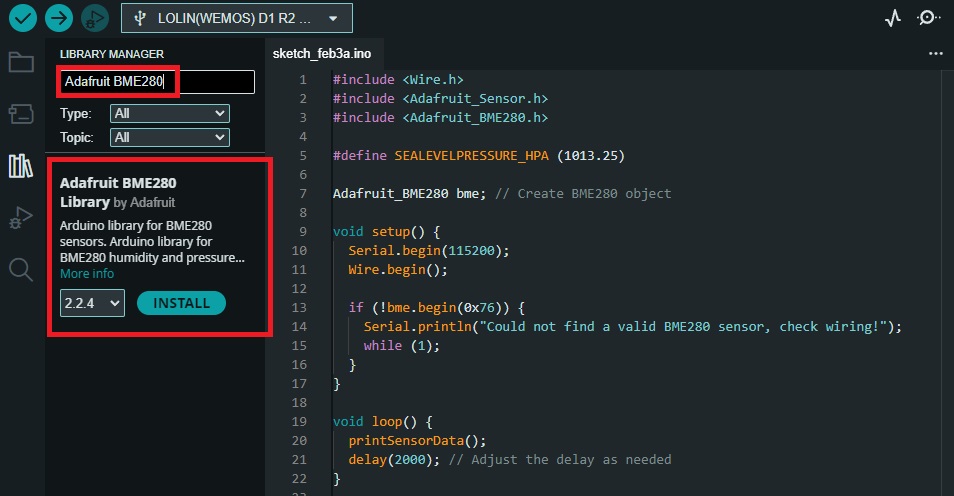
Step 1: Gather Necessary Libraries
Before starting the project, make sure you have the necessary libraries installed. Open the Arduino IDE and navigate to Sketch -> Include Library -> Manage Libraries. Search for and install the following libraries:
Adafruit Unified SensorAdafruit BME280
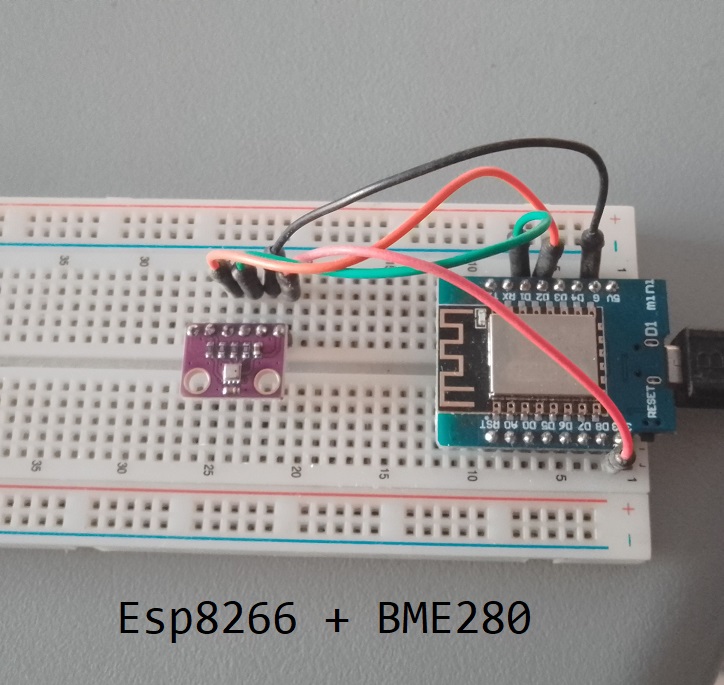
Step 2: Wiring the Components
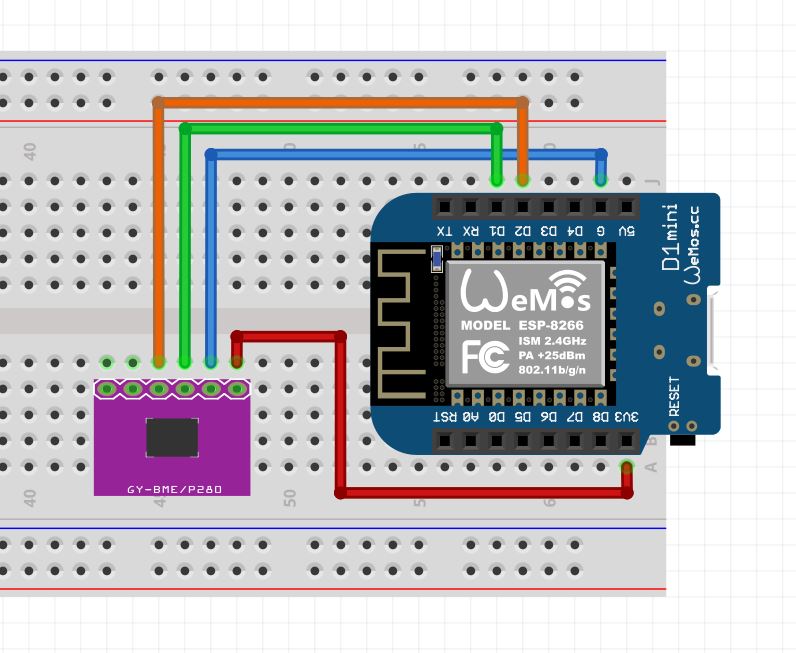
Connect the components as follows:
- Wemos D1 Mini to BME280:
- D1 (SCL) -> BME280 SDA
- D2 (SDA) -> BME280 SCL
- 3V3 -> BME280 VCC
- GND -> BME280 GND
Step 3: Arduino Sketch
Now, let’s write a simple Arduino sketch to read data from the BME280 sensor and print it on the Serial Monitor.
#include <Wire.h>
#include <Adafruit_Sensor.h>
#include <Adafruit_BME280.h>

#define SEALEVELPRESSURE_HPA (1013.25)

Adafruit_BME280 bme; // Create BME280 object

void setup() {
  Serial.begin(115200);
  Wire.begin();

  if (!bme.begin(0x76)) {
    Serial.println("Could not find a valid BME280 sensor, check wiring!");
    while (1);
  }
}

void loop() {
  printSensorData();
  delay(2000); // Adjust the delay as needed
}

void printSensorData() {
  Serial.println("BME280 Sensor Data:");
  Serial.print("Temperature: ");
  Serial.print(bme.readTemperature());
  Serial.println(" °C");

  Serial.print("Humidity: ");
  Serial.print(bme.readHumidity());
  Serial.println(" %");

  Serial.print("Pressure: ");
  Serial.print(bme.readPressure() / 100.0F); // hPa to Pa conversion
  Serial.println(" hPa");

  Serial.print("Altitude: ");
  Serial.print(bme.readAltitude(SEALEVELPRESSURE_HPA));
  Serial.println(" meters");

  Serial.println();
}
Sea Level Pressure
Determining the accurate sea level pressure for your specific location typically involves consulting weather data sources or atmospheric pressure measurements from meteorological stations. Here are steps you can take to find the sea level pressure:
- Weather Websites:
- Websites like Weather.com, AccuWeather, or your local meteorological agency’s website typically provide current weather conditions, including atmospheric pressure at sea level.
- National Meteorological Services:
- Government meteorological services for your country or region often provide reliable weather data. You can search for your local meteorological office or national weather service website.
- Barometric Pressure Sensor Documentation:
- If you’re using a barometric pressure sensor with your Esp8266, refer to the sensor’s documentation for guidance on obtaining accurate atmospheric pressure readings.
- Online Maps and Resources:
- Websites that offer global weather maps, such as Windy.com or Earth.nullschool.net, may provide atmospheric pressure information. These maps can show real-time pressure patterns around the world
When you obtain the sea level pressure for your location, replace the existing value in the Arduino code:
#define SEALEVELPRESSURE_HPA (your_sea_level_pressure)
Replace your_sea_level_pressure with the accurate sea level pressure value you obtained. Ensure that the value is in hectopascals (hPa) or the appropriate unit used by the BME280 sensor.
Remember to recalibrate this value periodically or as needed based on changes in atmospheric conditions for accurate altitude calculations.
Step 4: Upload and Monitor
Upload the sketch to your Wemos D1 Mini by selecting the correct board and port in the Arduino IDE. Once uploaded, open the Serial Monitor (Tools -> Serial Monitor). You should see the BME280 sensor data being printed every 2 seconds.
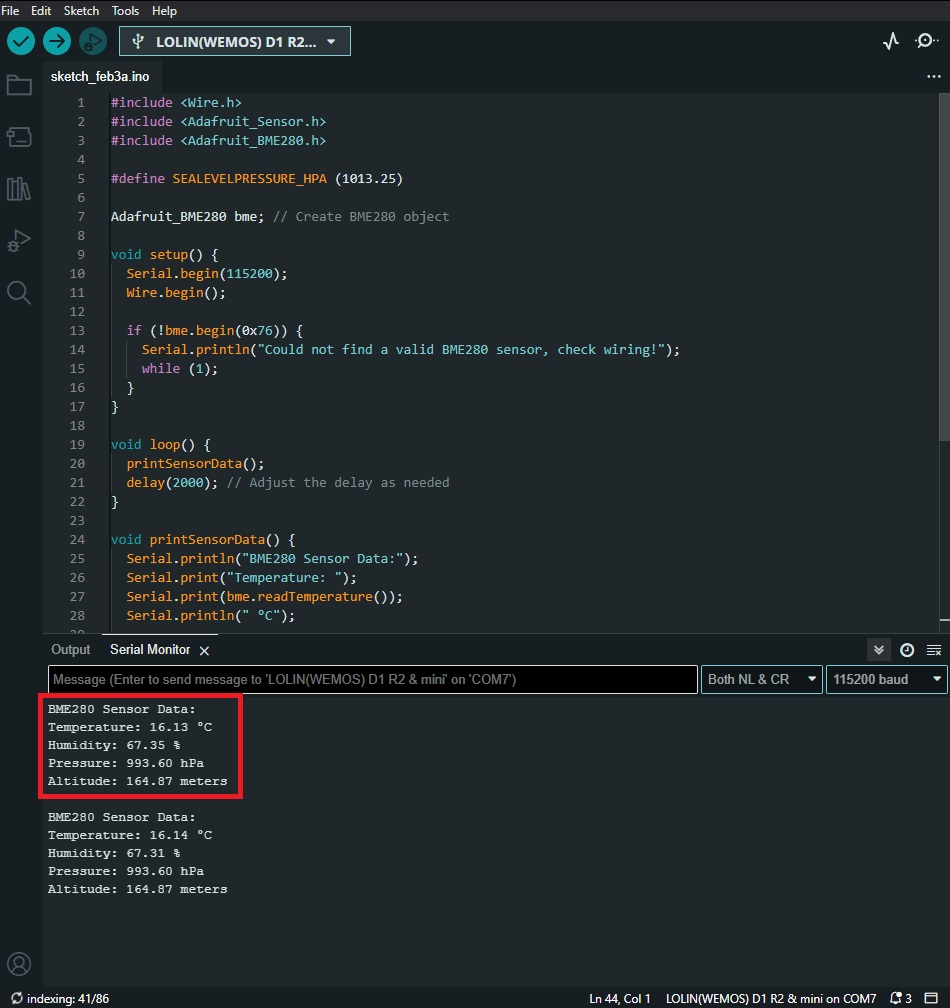
Conclusion:
Congratulations! You have successfully connected a BME280 sensor to a Wemos D1 Mini and displayed temperature, humidity, pressure, and altitude data on the Serial Monitor. This project serves as a foundation for more advanced applications involving IoT and sensor data logging. Experiment and explore further to enhance your understanding of sensor integration with microcontrollers.