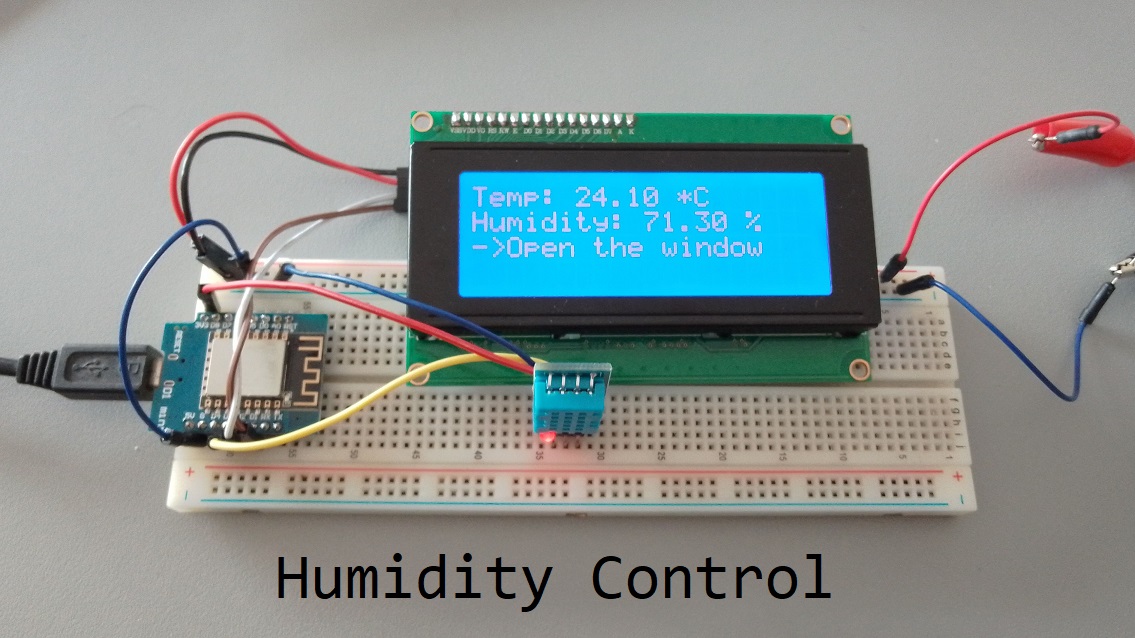
Connect ESP8266 and DHT11 for Indoor Humidity Control
What is the indoor humidity Threshold level at which you want to open the windows?
The ideal indoor humidity level for most homes is typically between 30% and 50%. However, the specific threshold at which you may want to open the windows can vary depending on personal preference and the climate you live in.
In general, if the indoor humidity level exceeds 50%, it may start to feel uncomfortable and create conditions that promote the growth of mold and mildew. Opening windows can help to bring in fresh air and reduce humidity levels.
On the other hand, if the outdoor humidity is high, opening the windows may not effectively lower the indoor humidity and could instead increase it. In such cases, it is advisable to rely on air conditioning or dehumidifiers to control indoor humidity levels.
It’s worth noting that certain activities like cooking, showering, or using humidifiers can temporarily increase indoor humidity. In these cases, it’s a good idea to open windows or use exhaust fans to remove excess moisture and maintain a comfortable humidity level.
Ultimately, the decision to open windows to control indoor humidity should be based on your comfort level, the specific circumstances, and the climate conditions in your area.
Components Required
- ESP8266 development board (e.g., NodeMCU or Wemos D1 Mini) (Affiliate) – https://s.click.aliexpress.com/e/_DD3JQhj
- 2004 LCD module (with I2C interface) – (Affiliate) – https://s.click.aliexpress.com/e/_DE4GaZb
- DHT11 temperature and humidity sensor (Affiliate) – https://s.click.aliexpress.com/e/_DFb2JzR
- Breadboard and jumper wires (Affiliate) – https://s.click.aliexpress.com/e/_Dl5kuk1
Circuit Connection
-
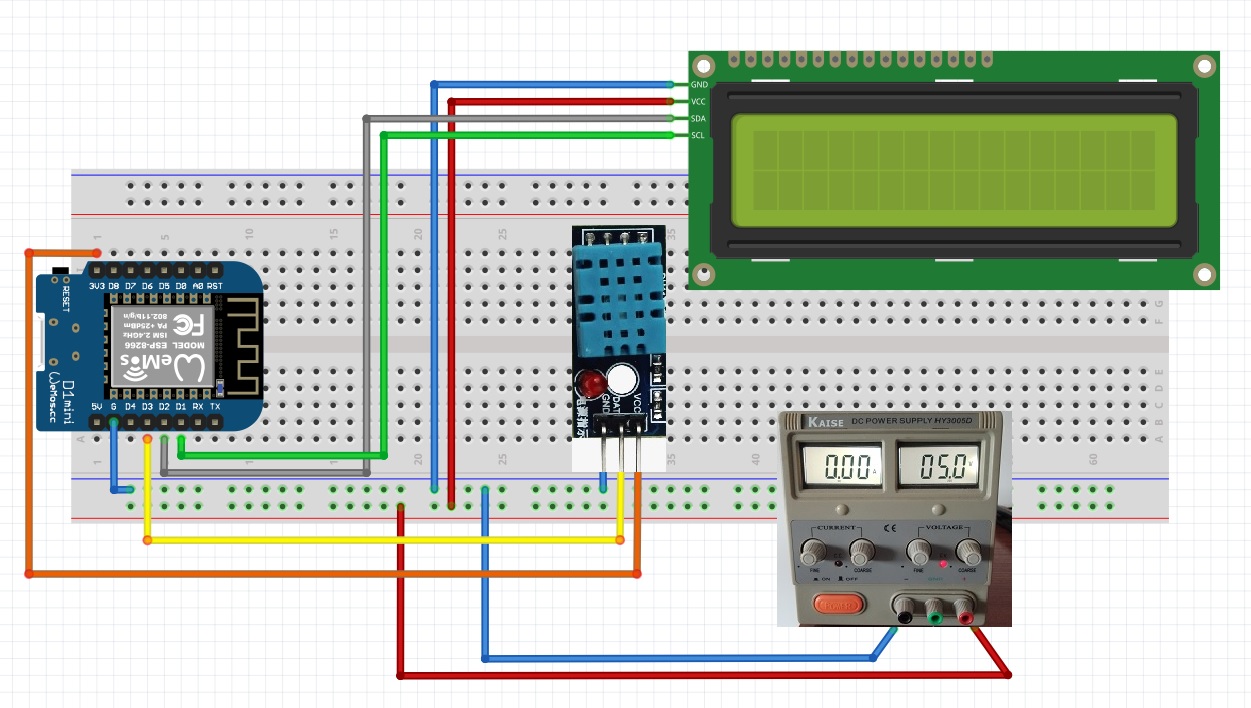
First, let’s connect the components on the breadboard. Follow the wiring diagram below:
- Connect the VCC pin of the 2004 LCD to the 5V
- Connect the GND pin of the 2004 LCD to the GND
- Connect the SDA pin of the 2004 LCD to the D2 pin of the ESP8266.
- Connect the SCL pin of the 2004 LCD to the D1 pin of the ESP8266.
- Connect the VCC pin of the DHT11 sensor to the 3.3V pin of the ESP8266.
- Connect the GND pin of the DHT11 sensor to the GND pin of the ESP8266.
- Connect the DATA pin of the DHT11 sensor to the D3 pin of the ESP8266.
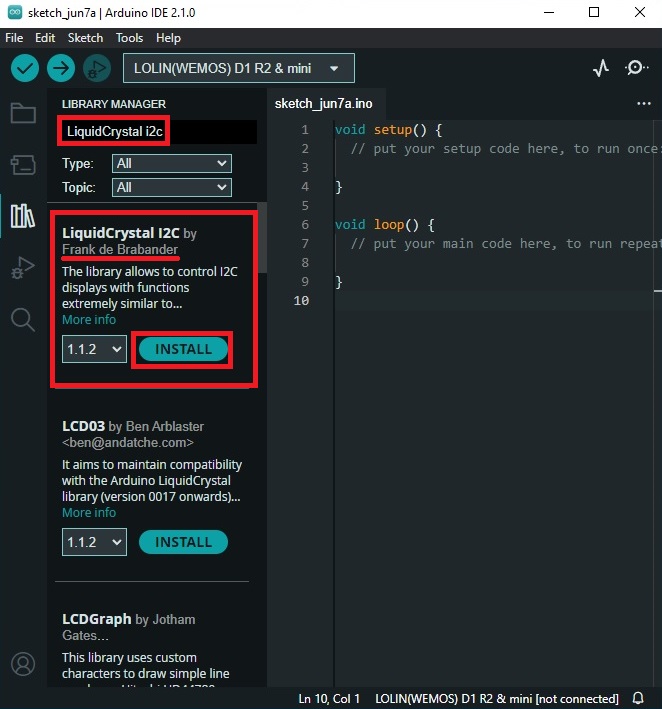
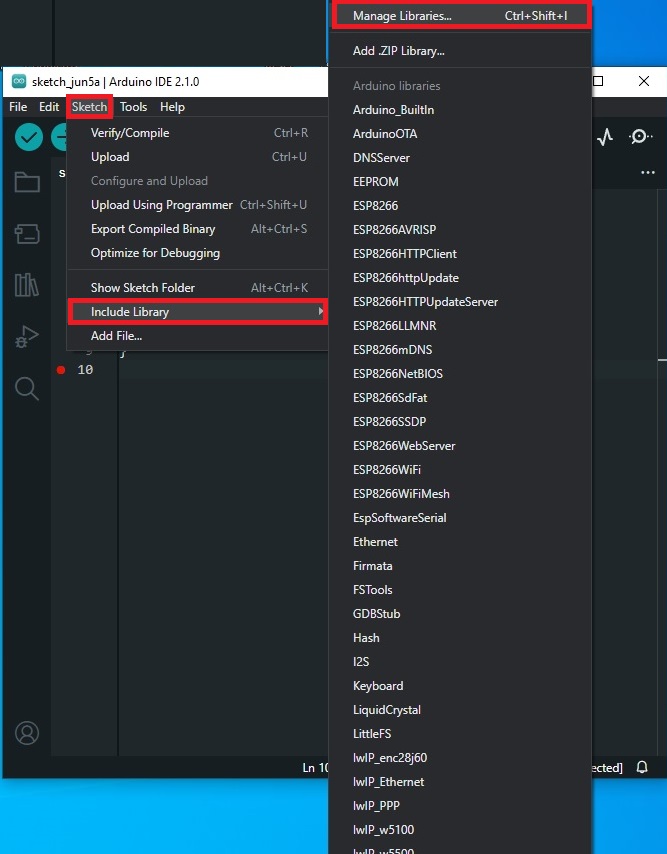
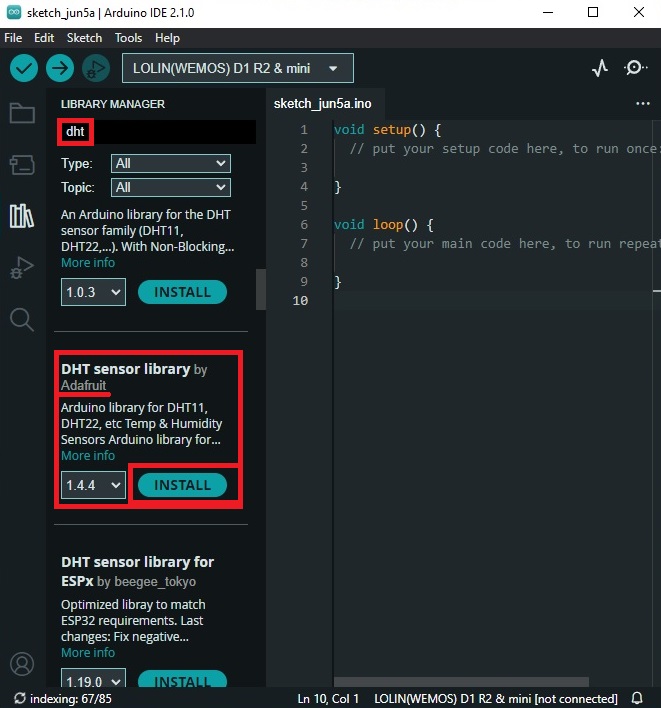
Installing the Required Libraries
- LiquidCrystal_I2C: For controlling the 2004 LCD.

- DHT: For reading data from the DHT11 sensor.
Code Explanation
#include <Wire.h>
#include <LiquidCrystal_I2C.h>
#include <DHT.h>

#define DHTPIN D3
#define DHTTYPE DHT11

DHT dht(DHTPIN, DHTTYPE);
LiquidCrystal_I2C lcd(0x27,20,4);  // set the LCD address to 0x27 for a 16 chars and 2 line display

void setup()
{
  lcd.init();                      // initialize the lcd
  lcd.backlight();
  dht.begin();
}

void loop()
{
  float h = dht.readHumidity();
  float t = dht.readTemperature();

  lcd.setCursor(0,0);
  lcd.print("Temp: ");
  lcd.print(t);
  lcd.print(" *C");
  lcd.setCursor(0,1);
  lcd.print("Humidity: ");
  lcd.print(h);
  lcd.print(" %");

  if(h > 50) {
    lcd.setCursor(0,2);
    lcd.print("->Open the window");
  } else {
    lcd.setCursor(0,2);
    lcd.print("->Humidity levels OK");
  }

  delay(2000);
}
- In the setup() function, we initialize the LCD and the DHT sensor.
- In the loop() function, we read the humidity and temperature from the DHT sensor and display them on the LCD.
- If the humidity is above 50%, we display “Open the window” on the LCD; otherwise, we display “Humidity levels OK”.
- The delay at the end of the loop is to prevent the DHT sensor from being read too frequently, as it can only provide new data every 2 seconds.
Conclusion